Build Production-Ready LLM Agents with LangChain 1.0 Middleware
Table of Contents
Introduction
Introduction to Middleware Pattern
Installation
Message Summarization
PII Detection and Filtering
Human-in-the-Loop
Task Planning
Intelligent Tool Selection
Building a Production Agent with Multiple Middleware
Final Thoughts
Introduction
Have you ever wanted to extend your LLM agent with custom behaviors like:
Summarizing messages to manage context windows
Filtering PII to protect sensitive data
Requesting human approval for critical actions
…but weren’t sure how to build them?
If you’ve tried this in LangChain v0.x, you probably ran into complex pre/post hooks that were hard to scale or test.
LangChain 1.0 introduces a composable middleware architecture that solves these problems by providing reusable, testable components that follow web server middleware patterns.
💻 Get the Code: The complete source code and Jupyter notebook for this tutorial are available on GitHub. Clone it to follow along!
Stay Current with CodeCut
Actionable Python tips, curated for busy data pros. Skim in under 2 minutes, three times a week.
.codecut-subscribe-form .codecut-input {
background: #2F2D2E !important;
border: 1px solid #72BEFA !important;
color: #FFFFFF !important;
}
.codecut-subscribe-form .codecut-input::placeholder {
color: #999999 !important;
}
.codecut-subscribe-form .codecut-subscribe-btn {
background: #72BEFA !important;
color: #2F2D2E !important;
}
.codecut-subscribe-form .codecut-subscribe-btn:hover {
background: #5aa8e8 !important;
}
.codecut-subscribe-form {
max-width: 650px;
display: flex;
flex-direction: column;
gap: 8px;
}
.codecut-input {
-webkit-appearance: none;
-moz-appearance: none;
appearance: none;
background: #FFFFFF;
border-radius: 8px !important;
padding: 8px 12px;
font-family: ‘Comfortaa’, sans-serif !important;
font-size: 14px !important;
color: #333333;
border: none !important;
outline: none;
width: 100%;
box-sizing: border-box;
}
input[type=”email”].codecut-input {
border-radius: 8px !important;
}
.codecut-input::placeholder {
color: #666666;
}
.codecut-email-row {
display: flex;
align-items: stretch;
height: 36px;
gap: 8px;
}
.codecut-email-row .codecut-input {
flex: 1;
}
.codecut-subscribe-btn {
background: #72BEFA;
color: #2F2D2E;
border: none;
border-radius: 8px;
padding: 8px 14px;
font-family: ‘Comfortaa’, sans-serif;
font-size: 14px;
font-weight: 500;
cursor: pointer;
text-decoration: none;
display: flex;
align-items: center;
justify-content: center;
transition: background 0.3s ease;
}
.codecut-subscribe-btn:hover {
background: #5aa8e8;
}
.codecut-subscribe-btn:disabled {
background: #999;
cursor: not-allowed;
}
.codecut-message {
font-family: ‘Comfortaa’, sans-serif;
font-size: 12px;
padding: 8px;
border-radius: 6px;
display: none;
}
.codecut-message.success {
background: #d4edda;
color: #155724;
display: block;
}
/* Mobile responsive */
@media (max-width: 480px) {
.codecut-email-row {
flex-direction: column;
height: auto;
gap: 8px;
}
.codecut-input {
border-radius: 8px;
height: 36px;
}
.codecut-subscribe-btn {
width: 100%;
text-align: center;
border-radius: 8px;
height: 36px;
}
}
Subscribe
Introduction to Middleware Pattern
Building on the LangChain fundamentals we covered earlier, LangChain 1.0 introduces middleware components that give you fine-grained control over agent execution. Each middleware is a self-contained component that:
Focuses on a single responsibility (monitor, modify, control, or enforce)
Can be tested independently
Composes with other middleware through a standard interface
The four middleware categories are:
Monitor: Track agent behavior with logging, analytics, and debugging
Modify: Transform prompts, tool selection, and output formatting
Control: Add retries, fallbacks, and early termination logic
Enforce: Apply rate limits, guardrails, and PII detection
This article covers five essential middleware components:
Message summarization (modify): Manage context windows by condensing long conversations
PII filtering (enforce): Protect sensitive data by redacting emails and phone numbers
Human-in-the-loop (control): Pause execution for critical actions requiring approval
Task planning (modify): Structure complex requests into manageable subtasks
Intelligent tool selection (modify): Pre-filter tools to reduce costs and improve accuracy
Let’s explore how each middleware component improves production agent workflows.
Installation
Install LangChain 1.0 and the OpenAI integration:
# Option 1: pip
pip install langchain langchain-openai
# Option 2: uv (faster alternative to pip)
uv add langchain langchain-openai
Note: If you’re upgrading from LangChain v0.x, add the –U flag: pip install –U langchain langchain-openai
You’ll also need an OpenAI API key:
export OPENAI_API_KEY="your-api-key-here"
Message Summarization
When building conversational agents, message history grows with each turn. Long conversations quickly exceed model context windows, causing API errors or degraded performance.
SummarizationMiddleware automates this by:
Monitoring token count across the conversation
Condensing older messages when thresholds are exceeded
Preserving recent context for immediate relevance
The benefits:
Reduced API costs from sending fewer tokens per request
Faster responses with smaller context windows
Complete context through summaries plus full recent history
Here’s how to use SummarizationMiddleware as part of an agent:
from langchain.agents import create_agent
from langchain.agents.middleware import SummarizationMiddleware
agent = create_agent(
model="openai:gpt-4o",
tools=[],
middleware=[
SummarizationMiddleware(
model="openai:gpt-4o-mini",
max_tokens_before_summary=400,
messages_to_keep=5
)
]
)
This configuration sets up automatic conversation management:
model="openai:gpt-4o" – The primary model for agent responses
max_tokens_before_summary=400 – Triggers summarization when conversation exceeds 400 tokens
messages_to_keep=5 – Preserves the 5 most recent messages in full
model="openai:gpt-4o-mini" – Uses a faster, cheaper model for creating summaries
Note: These configuration values are set low for demonstration purposes to quickly show summarization behavior. Production applications typically use max_tokens_before_summary=4000 and messages_to_keep=20 (the recommended defaults).
Let’s use this agent to simulate a customer support conversation and track token usage.
First, let’s set up a realistic customer support conversation with multiple turns:
# Simulate a customer support conversation
conversation_turns = [
"I ordered a laptop last week but haven't received it yet. Order #12345.",
"Can you check the shipping status? I need it for work next Monday.",
"Also, I originally wanted the 16GB RAM model but ordered 8GB by mistake.",
"Is it too late to change the order? Or should I return and reorder?",
"What's your return policy on laptops? Do I need the original packaging?",
"If I return it, how long does the refund take to process?",
"Can I get expedited shipping on the replacement 16GB model?",
"Does the 16GB version come with the same warranty as the 8GB?",
"Are there any promotional codes I can use for the new order?",
"What if the new laptop arrives damaged? What's the process?",
]
Next, define helper functions to track token usage and verify summarization:
estimate_token_count(): Calculates approximate tokens by counting words in all messages
get_actual_tokens(): Extracts the actual token count from the model’s response metadata
print_token_comparison(): Displays estimated vs actual tokens to show when summarization occurs
def estimate_token_count(messages):
"""Estimate total tokens in message history."""
return sum(len(msg.content.split()) * 1.3 for msg in messages)
def get_actual_tokens(response):
"""Extract actual token count from response metadata."""
last_ai_message = response["messages"][-1]
if hasattr(last_ai_message, 'usage_metadata') and last_ai_message.usage_metadata:
return last_ai_message.usage_metadata.get("input_tokens", 0)
return None
def print_token_comparison(turn_number, estimated, actual):
"""Print token count comparison for a conversation turn."""
if actual is not None:
print(f"Turn {turn_number}: ~{int(estimated)} tokens (estimated) → {actual} tokens (actual)")
else:
print(f"Turn {turn_number}: ~{int(estimated)} tokens (estimated)")
Finally, run the conversation and observe token usage across turns:
messages = []
for i, question in enumerate(conversation_turns, 1):
messages.append(HumanMessage(content=question))
estimated_tokens = estimate_token_count(messages)
response = agent.invoke({"messages": messages})
messages.extend(response["messages"][len(messages):])
actual_tokens = get_actual_tokens(response)
print_token_comparison(i, estimated_tokens, actual_tokens)
Output:
Turn 1: ~16 tokens (estimated) → 24 tokens (actual)
Turn 2: ~221 tokens (estimated) → 221 tokens (actual)
Turn 3: ~408 tokens (estimated) → 415 tokens (actual)
Turn 4: ~646 tokens (estimated) → 509 tokens (actual)
Turn 5: ~661 tokens (estimated) → 524 tokens (actual)
Turn 6: ~677 tokens (estimated) → 379 tokens (actual)
Turn 7: ~690 tokens (estimated) → 347 tokens (actual)
Turn 8: ~705 tokens (estimated) → 184 tokens (actual)
Turn 9: ~721 tokens (estimated) → 204 tokens (actual)
Turn 10: ~734 tokens (estimated) → 195 tokens (actual)
Notice the pattern in the token counts:
Turns 1-3: Tokens grow steadily (24 → 221 → 415) as the conversation builds
Turn 4: Summarization kicks in with actual tokens dropping to 509 despite 646 estimated
Turn 8: Most dramatic reduction with only 184 actual tokens sent vs 705 estimated (74% reduction!)
Once past the 400-token threshold, the middleware automatically condenses older messages while preserving the 5 most recent turns. This keeps token usage low even as the conversation continues.
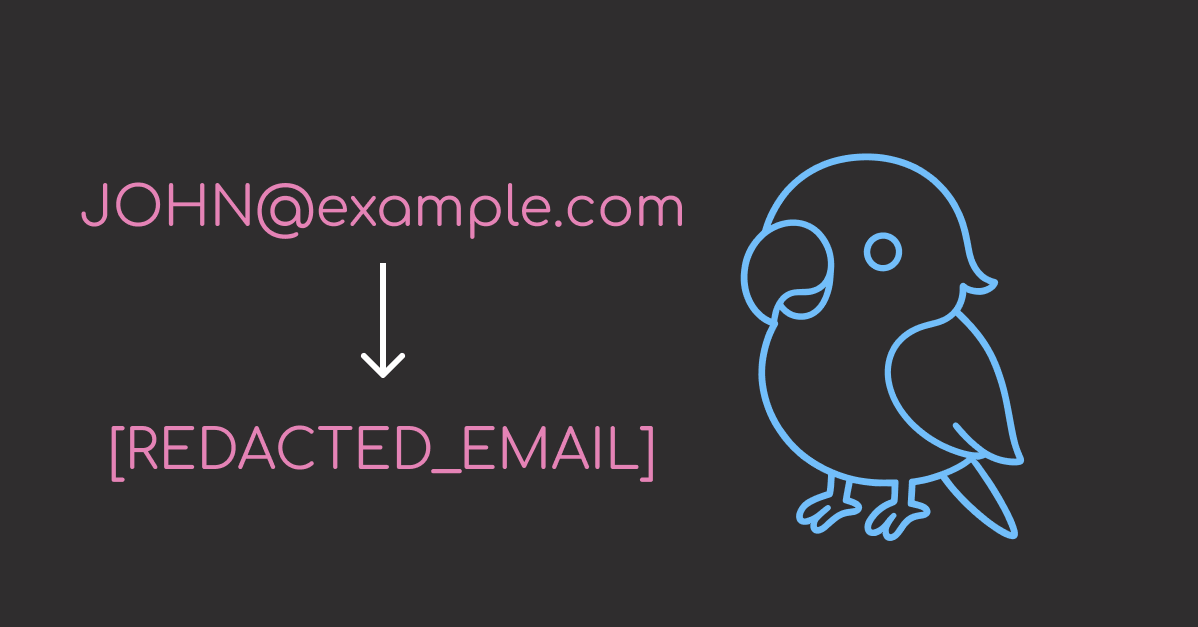
PII Detection and Filtering
Customer support conversations often contain sensitive information like email addresses, phone numbers, and account IDs. Logging or storing this data without redaction creates compliance and security risks.
PIIMiddleware automatically protects personally identifiable information (PII) by:
Built-in detectors for common PII types (email, credit cards, IP addresses)
Custom regex patterns for domain-specific sensitive data
Multiple protection strategies: redact, mask, hash, or block
Automatic application to all messages before model processing
First, configure the agent with multiple PII detectors:
Each detector in this example demonstrates a different protection strategy:
Email detector: Uses built-in pattern with redact strategy (complete replacement)
Phone detector: Uses custom regex \b\d{3}-\d{3}-\d{4}\b with mask strategy (partial visibility)
Account ID detector: Uses custom pattern \b[A-Z]{2}\d{8}\b with redact strategy (complete removal)
from langchain.agents import create_agent
from langchain.agents.middleware import PIIMiddleware
from langchain_core.messages import HumanMessage
agent = create_agent(
model="openai:gpt-4o",
tools=[],
middleware=[
# Built-in email detector – replaces emails with [REDACTED_EMAIL]
PIIMiddleware("email", strategy="redact", apply_to_input=True),
# Custom phone number pattern – shows only last 4 digits
PIIMiddleware(
"phone",
detector=r"\b\d{3}-\d{3}-\d{4}\b",
strategy="mask",
apply_to_input=True,
),
# Custom regex pattern for account IDs (e.g., AB12345678)
PIIMiddleware(
"account_id",
detector=r"\b[A-Z]{2}\d{8}\b",
strategy="redact",
apply_to_input=True,
),
],
)
Next, create a message containing sensitive information and invoke the agent:
# Create a message with PII
original_message = HumanMessage(content="My email is john@example.com, phone is 555-123-4567, and account is AB12345678")
print(f"Original message: {original_message.content}")
# Invoke the agent
response = agent.invoke({"messages": [original_message]})
Output:
Original message: My email is john@example.com, phone is 555-123-4567, and account is AB12345678
Finally, inspect the message that was actually sent to the model to verify redaction:
# Check what was actually sent to the model (after PII redaction)
input_message = response["messages"][0]
print(f"Message sent to model: {input_message.content}")
Output:
Message sent to model: My email is [REDACTED_EMAIL], phone is ****4567, and account is [REDACTED_ACCOUNT_ID]
The middleware successfully processed all three types of sensitive information:
Email: Completely redacted to [REDACTED_EMAIL]
Phone: Masked to show only last 4 digits (****4567)
Account ID: Completely redacted to [REDACTED_ACCOUNT_ID]
Human-in-the-Loop
Autonomous agents can perform sensitive actions like processing refunds or modifying account settings. Executing these without human oversight creates risk of errors or abuse.
HumanInTheLoopMiddleware automates approval workflows by pausing execution and waiting for approval before proceeding:
from langchain.agents import create_agent
from langchain.agents.middleware import HumanInTheLoopMiddleware
from langchain_core.tools import tool
from langgraph.checkpoint.memory import MemorySaver
@tool
def process_refund(amount: float, reason: str) -> str:
"""Process a customer refund. Use this when a customer requests a refund."""
return f"Refund of ${amount} processed for reason: {reason}"
# Create memory checkpointer for state persistence
memory = MemorySaver()
agent = create_agent(
model="openai:gpt-4o",
tools=[process_refund],
middleware=[HumanInTheLoopMiddleware(interrupt_on={"process_refund": True})],
checkpointer=memory, # Required for state persistence
system_prompt="You are a customer support agent. Use the available tools to help customers. When a customer asks for a refund, use the process_refund tool.",
)
This configuration sets up an agent that:
Uses HumanInTheLoopMiddleware to pause execution before calling process_refund
Uses a checkpointer (MemorySaver) to save agent state during interruptions, allowing execution to resume after approval
Now let’s invoke the agent with a refund request:
# Agent pauses before executing sensitive tools
response = agent.invoke(
{"messages": [("user", "I need a refund of $100 for my damaged laptop")]},
config={"configurable": {"thread_id": "user-123"}},
)
The agent will pause when it tries to process the refund. To verify this happened, let’s define helper functions for interrupt detection.
def has_interrupt(response):
"""Check if response contains an interrupt."""
return "__interrupt__" in response
def display_action(action):
"""Display pending action details."""
print(f"Pending action: {action['name']}")
print(f"Arguments: {action['args']}")
print()
def get_user_approval():
"""Prompt user for approval and return decision."""
approval = input("Approve this action? (yes/no): ")
if approval.lower() == "yes":
print("✓ Action approved")
return True
else:
print("✗ Action rejected")
return False
Now use these helpers to check for interrupts and process approval:
if has_interrupt(response):
print("Execution interrupted – waiting for approval\n")
interrupts = response["__interrupt__"]
for interrupt in interrupts:
for action in interrupt.value["action_requests"]:
display_action(action)
approved = get_user_approval()
Output:
Execution interrupted – waiting for approval
Pending action: process_refund
Arguments: {'amount': 100, 'reason': 'Damaged Laptop'}
Approve this action? (yes/no): yes
✓ Action approved
The middleware successfully intercepted the process_refund tool call before execution, displaying all necessary details (action name and arguments) for human review. Only after explicit approval does the agent proceed with the sensitive operation.
Task Planning
Complex tasks like “refactor my codebase” or “analyze this dataset” require breaking down into smaller, manageable steps. Without explicit planning, agents often might jump between subtasks randomly or skip critical steps entirely.
TodoListMiddleware enables structured task management by:
Automatically providing a write_todos tool for task planning
Tracking completion status across multi-step workflows
Returning structured todo items in agent results
The benefits:
Better task decomposition through explicit step-by-step planning
Progress tracking to monitor complex workflow completion
Reduced errors from skipped or forgotten subtasks
Here’s how to enable planning for an agent:
from langchain.agents import create_agent
from langchain.agents.middleware import TodoListMiddleware
from langchain_core.tools import tool
@tool
def analyze_code(file_path: str) -> str:
"""Analyze code quality and find issues."""
return f"Analyzed {file_path}: Found 3 code smells, 2 security issues"
@tool
def refactor_code(file_path: str, changes: str) -> str:
"""Refactor code with specified changes."""
return f"Refactored {file_path}: {changes}"
agent = create_agent(
model="openai:gpt-4o",
tools=[analyze_code, refactor_code],
middleware=[TodoListMiddleware()]
)
This configuration automatically injects planning capabilities into the agent.
Now let’s ask the agent to perform a multi-step refactoring task:
from langchain_core.messages import HumanMessage
response = agent.invoke({
"messages": [HumanMessage("I need to refactor my authentication module. First analyze it, then suggest improvements, and finally implement the changes.")]
})
Check the agent’s todo list to see how it planned the work:
# Access the structured todo list from the response
if "todos" in response:
print("Agent's Task Plan:")
for i, todo in enumerate(response["todos"], 1):
status = todo.get("status", "pending")
print(f"{i}. [{status}] {todo['content']}")
Output:
Agent's Task Plan:
1. [in_progress] Analyze the authentication module code to identify quality issues and areas for improvement.
2. [pending] Suggest improvements based on the analysis of the authentication module.
3. [pending] Implement the suggested improvements in the authentication module code.
Nice! The agent automatically decomposed the multi-step refactoring request into 3 distinct tasks, with 1 in progress and 2 pending. This structured approach ensures systematic execution without skipping critical steps.
Intelligent Tool Selection
Agents with many tools (10+) face a scaling problem: sending all tool descriptions with every request wastes tokens and degrades performance. The model must process irrelevant options, increasing latency and cost.
LLMToolSelectorMiddleware solves this by using a smaller model to pre-filter relevant tools:
Uses a secondary LLM (separate from the main agent model) to pre-filter and limit tools sent to main model
Allows critical tools to always be included in selection
Analyzes queries to select only relevant tools
The benefits:
Lower costs from sending fewer tool descriptions per request
Faster responses with smaller tool context
Better accuracy when model isn’t distracted by irrelevant options
Let’s create an agent with many tools for a customer support scenario:
from langchain.agents import create_agent
from langchain.agents.middleware import LLMToolSelectorMiddleware
from langchain_core.tools import tool
# Define multiple tools for different support scenarios
@tool
def lookup_order(order_id: str) -> str:
"""Look up order details and shipping status."""
return f"Order {order_id}: Shipped on 2025-01-15"
@tool
def process_refund(order_id: str, amount: float) -> str:
"""Process a customer refund."""
return f"Refund of ${amount} processed for order {order_id}"
@tool
def check_inventory(product_id: str) -> str:
"""Check product inventory levels."""
return f"Product {product_id}: 42 units in stock"
@tool
def update_address(order_id: str, new_address: str) -> str:
"""Update shipping address for an order."""
return f"Address updated for order {order_id}"
@tool
def cancel_order(order_id: str) -> str:
"""Cancel an existing order."""
return f"Order {order_id} cancelled"
@tool
def track_shipment(tracking_number: str) -> str:
"""Track package location."""
return f"Package {tracking_number}: Out for delivery"
@tool
def apply_discount(order_id: str, code: str) -> str:
"""Apply discount code to order."""
return f"Discount {code} applied to order {order_id}"
@tool
def schedule_delivery(order_id: str, date: str) -> str:
"""Schedule delivery for specific date."""
return f"Delivery scheduled for {date}"
Configure the agent with intelligent tool selection:
agent = create_agent(
model="openai:gpt-4o",
tools=[
lookup_order, process_refund, check_inventory,
update_address, cancel_order, track_shipment,
apply_discount, schedule_delivery
],
middleware=[
LLMToolSelectorMiddleware(
model="openai:gpt-4o-mini", # Use cheaper model for selection
max_tools=3, # Limit to 3 most relevant tools
always_include=["lookup_order"], # Always include order lookup
)
]
)
This configuration creates an efficient filtering system:
model="openai:gpt-4o-mini" – Uses a smaller, faster model for tool selection
max_tools=3 – Limits to 3 most relevant tools per query
always_include=["lookup_order"] – Ensures order lookup is always available
Now test the agent with different customer requests:
First, define a helper function to display tool usage:
def show_tools_used(response):
"""Display which tools were called during agent execution."""
tools_used = []
for msg in response["messages"]:
if hasattr(msg, "tool_calls") and msg.tool_calls:
for tool_call in msg.tool_calls:
tools_used.append(tool_call["name"])
if tools_used:
print(f"Tools used: {', '.join(tools_used)}")
print(f"Response: {response['messages'][-1].content}\n")
Test with a package tracking query:
# Example 1: Package tracking query
response = agent.invoke({
"messages": [HumanMessage("Where is my package? Tracking number is 1Z999AA10123456784")]
})
show_tools_used(response)
Output:
Tools used: track_shipment
Response: Your package with tracking number 1Z999AA10123456784 is currently out for delivery.
Test with a refund request:
# Example 2: Refund request
response = agent.invoke({
"messages": [HumanMessage("I need a refund of $50 for order ORD-12345")]
})
show_tools_used(response)
Output:
Tools used: lookup_order, process_refund
Response: The refund of $50 for order ORD-12345 has been successfully processed.
Test with an inventory check:
# Example 3: Inventory check
response = agent.invoke({
"messages": [HumanMessage("Do you have product SKU-789 in stock?")]
})
show_tools_used(response)
Output:
Tools used: check_inventory
Response: Yes, we currently have 42 units of product SKU-789 in stock.
The middleware demonstrated precise tool selection across different query types:
track_shipment for tracking numbers
lookup_order + process_refund for refund requests
check_inventory for stock queries
Each request filtered out 5+ irrelevant tools, sending only what was needed to the main model.
Building a Production Agent with Multiple Middleware
Let’s combine three middleware components to build a production-ready customer support agent that handles a realistic scenario: a customer with a long conversation history requesting a refund and sharing their email address.
from langchain.agents import create_agent
from langchain.agents.middleware import (
SummarizationMiddleware,
PIIMiddleware,
HumanInTheLoopMiddleware
)
from langchain_core.tools import tool
from langgraph.checkpoint.memory import MemorySaver
@tool
def process_refund(amount: float, reason: str) -> str:
"""Process a customer refund."""
return f"Refund of ${amount} processed for reason: {reason}"
# Create agent with three middleware components
agent = create_agent(
model="openai:gpt-4o",
tools=[process_refund],
middleware=[
SummarizationMiddleware(
model="openai:gpt-4o-mini",
max_tokens_before_summary=400,
messages_to_keep=5
),
PIIMiddleware("email", strategy="redact", apply_to_input=True),
HumanInTheLoopMiddleware(interrupt_on={"process_refund": True})
],
checkpointer=MemorySaver()
)
Now test with a realistic customer interaction, processing each message to show how middleware handles them.
First, define a helper function to track middleware behavior using the helper functions defined earlier:
def process_message_with_tracking(agent, messages, thread_id, turn_num):
"""Process messages and show middleware behavior."""
print(f"\n— Turn {turn_num} —")
print(f"User: {messages[-1][1]}")
response = agent.invoke(
{"messages": messages},
config={"configurable": {"thread_id": thread_id}}
)
# Check for interrupts (human-in-the-loop)
if has_interrupt(response):
print("⏸ Execution paused for approval")
else:
# Show agent response
agent_message = response["messages"][-1].content
print(f"Agent: {agent_message}")
# Check for PII redaction
full_response = str(response["messages"])
if "[REDACTED_EMAIL]" in full_response:
print("🔒 PII detected and redacted")
return response
Now simulate a customer conversation that demonstrates all three middleware components:
Turns 1-3: Normal conversation flow about a damaged laptop
Turn 4: Customer shares email and asks for confirmation (tests PIIMiddleware redaction)
Turn 5: Customer requests $1200 refund (triggers HumanInTheLoopMiddleware approval)
messages = []
# Turn 1: Initial complaint
messages.append(("user", "I ordered a laptop but it arrived damaged."))
process_message_with_tracking(agent, messages, "customer-456", 1)
# Turn 2: Additional details
messages.append(("user", "I already tried troubleshooting but it won't turn on."))
process_message_with_tracking(agent, messages, "customer-456", 2)
# Turn 3: More context
messages.append(("user", "The screen is cracked and there's a dent on the corner."))
process_message_with_tracking(agent, messages, "customer-456", 3)
# Turn 4: PII exposure – test if middleware hides email from model
messages.append(("user", "My email is customer@example.com. Can you confirm my email address?"))
response = process_message_with_tracking(agent, messages, "customer-456", 4)
# Turn 5: Sensitive action request – triggers human approval
messages.append(("user", "Can I get a full refund of $1200?"))
response = process_message_with_tracking(agent, messages, "customer-456", 5)
# If interrupted, show approval flow
if has_interrupt(response):
interrupts = response["__interrupt__"]
for interrupt in interrupts:
for action in interrupt.value["action_requests"]:
display_action(action)
approved = get_user_approval()
Output:
— Turn 1 —
User: I ordered a laptop but it arrived damaged.
Agent: I'm sorry to hear that your laptop arrived damaged. To resolve this issue, I can assist you in processing a refund. Could you please provide the amount of the purchase and any specific reason you would like to include for the refund?
— Turn 2 —
User: I already tried troubleshooting but it won't turn on.
Agent: Thank you for sharing that information. I'll proceed with processing a refund for the damaged laptop. Could you please provide the purchase amount, so I can include it in the refund request?
— Turn 3 —
User: The screen is cracked and there's a dent on the corner.
Agent: I'm sorry to hear about the condition of your laptop. I will help you process a refund. Could you please let me know the purchase amount, so I can proceed with the refund request?
— Turn 4 —
User: My email is customer@example.com. Can you confirm my email address?
Agent: I'm sorry, but I'm unable to confirm or access email addresses for privacy and security reasons. However, I can assist you with processing a refund. Could you please provide the amount you paid for the laptop so that I can proceed with the refund request?
🔒 PII detected and redacted
— Turn 5 —
User: Can I get a full refund of $1200?
⏸ Execution paused for approval
Pending action: process_refund
Arguments: {'amount': 1200, 'reason': 'Laptop arrived damaged with a cracked screen and dent on the corner, and it will not turn on after troubleshooting.'}
Approve this action? (yes/no): yes
✓ Action approved
The output demonstrates proper security controls:
Turn 4: Agent states it “cannot confirm or access email addresses,” confirming PIIMiddleware successfully redacted customer@example.com to [REDACTED_EMAIL]
Email protection: Model never saw the actual address, preventing data leaks or logging
Refund approval: $1200 transaction didn’t execute until human approval was granted
For coordinating multiple agents with shared state and workflows, explore our LangGraph tutorial.
Final Thoughts
Building production LLM agents with LangChain 1.0 middleware requires minimal infrastructure code. Each component handles one concern: managing context windows, protecting sensitive data, controlling execution flow, or structuring complex tasks.
The best approach is incremental. Add one middleware at a time, test its behavior, then combine it with others. This modular design lets you start simple and expand as your agent’s requirements evolve.
Related Tutorials
Structured Outputs: Enforce Structured Outputs from LLMs with PydanticAI for type-safe agent responses
RAG Implementation: Build a Complete RAG System with 5 Open-Source Tools for question-answering agents
Vector Storage: Implement Semantic Search in Postgres Using pgvector and Ollama for production-grade embedding storage
📚 Want to go deeper? Learning new techniques is the easy part. Knowing how to structure, test, and deploy them is what separates side projects from real work. My book shows you how to build data science projects that actually make it to production. Get the book →
Stay Current with CodeCut
Actionable Python tips, curated for busy data pros. Skim in under 2 minutes, three times a week.
.codecut-subscribe-form .codecut-input {
background: #2F2D2E !important;
border: 1px solid #72BEFA !important;
color: #FFFFFF !important;
}
.codecut-subscribe-form .codecut-input::placeholder {
color: #999999 !important;
}
.codecut-subscribe-form .codecut-subscribe-btn {
background: #72BEFA !important;
color: #2F2D2E !important;
}
.codecut-subscribe-form .codecut-subscribe-btn:hover {
background: #5aa8e8 !important;
}
.codecut-subscribe-form {
max-width: 650px;
display: flex;
flex-direction: column;
gap: 8px;
}
.codecut-input {
-webkit-appearance: none;
-moz-appearance: none;
appearance: none;
background: #FFFFFF;
border-radius: 8px !important;
padding: 8px 12px;
font-family: ‘Comfortaa’, sans-serif !important;
font-size: 14px !important;
color: #333333;
border: none !important;
outline: none;
width: 100%;
box-sizing: border-box;
}
input[type=”email”].codecut-input {
border-radius: 8px !important;
}
.codecut-input::placeholder {
color: #666666;
}
.codecut-email-row {
display: flex;
align-items: stretch;
height: 36px;
gap: 8px;
}
.codecut-email-row .codecut-input {
flex: 1;
}
.codecut-subscribe-btn {
background: #72BEFA;
color: #2F2D2E;
border: none;
border-radius: 8px;
padding: 8px 14px;
font-family: ‘Comfortaa’, sans-serif;
font-size: 14px;
font-weight: 500;
cursor: pointer;
text-decoration: none;
display: flex;
align-items: center;
justify-content: center;
transition: background 0.3s ease;
}
.codecut-subscribe-btn:hover {
background: #5aa8e8;
}
.codecut-subscribe-btn:disabled {
background: #999;
cursor: not-allowed;
}
.codecut-message {
font-family: ‘Comfortaa’, sans-serif;
font-size: 12px;
padding: 8px;
border-radius: 6px;
display: none;
}
.codecut-message.success {
background: #d4edda;
color: #155724;
display: block;
}
/* Mobile responsive */
@media (max-width: 480px) {
.codecut-email-row {
flex-direction: column;
height: auto;
gap: 8px;
}
.codecut-input {
border-radius: 8px;
height: 36px;
}
.codecut-subscribe-btn {
width: 100%;
text-align: center;
border-radius: 8px;
height: 36px;
}
}
Subscribe
Build Production-Ready LLM Agents with LangChain 1.0 Middleware Read More »