
Table of Contents
- Introduction
- What Is SlimToolkit?
- Build the Chatbot Image
- Slim the Image
- Inspecting the Result with
slim xray - Final Thoughts
Introduction
Most Docker images contain far more than a Python application actually needs at runtime. They include full OS layers with shells, compilers, and utilities that often go completely unused, leading to unnecessarily large images that consume storage and slow deployment pipelines.
SlimToolkit analyzes your container at runtime, identifies which files are actually used, and builds a minimal image with only those dependencies.
This article walks through slimming a Chainlit LLM chatbot, but the same approach works on any Python container.
Stay Current with CodeCut
Easy-to-digest articles on Python, AI, and open-source tools. Delivered twice a week.
What Is SlimToolkit?
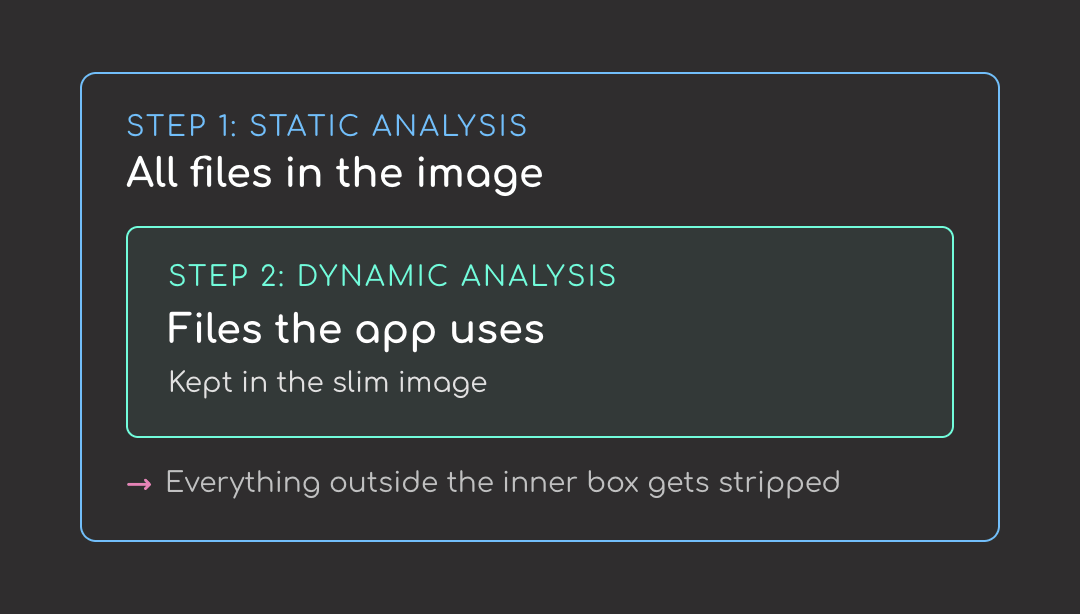
SlimToolkit is a command-line tool that strips unused files from a container image without touching your Dockerfile. It works in two steps:
- Static analysis. Looks at the image’s contents without running it.
- Dynamic analysis. Runs the image to see which files the app actually uses.
The first step lists everything in the image. The second narrows that list to what the app actually needs. Everything outside the second list gets stripped.
Install it via the official install script (works on Linux and macOS):
curl -sL https://raw.githubusercontent.com/slimtoolkit/slim/master/scripts/install-slim.sh | sudo -E bash -
Or with Homebrew on macOS:
brew install docker-slim
Verify the install:
slim --version
💻 Get the Code: The complete source code and Jupyter notebook for this tutorial are available on GitHub. Clone it to follow along!
Build the Chatbot Image
To test SlimToolkit, build a small Chainlit chatbot image first. We’ll write a small Chainlit chatbot, package it with a Dockerfile, and build it.
The Chainlit App
The chatbot app uses two libraries:
- Chainlit: an open-source Python framework for building LLM chat UIs; provides the web interface and message handling
- OpenAI SDK: calls
gpt-4o-minifor responses
# app.py
import os
import chainlit as cl
from openai import AsyncOpenAI

client = AsyncOpenAI(api_key=os.environ.get("OPENAI_API_KEY"))


@cl.on_chat_start
async def start():
    cl.user_session.set("messages", [])


@cl.on_message
async def main(message: cl.Message):
    messages = cl.user_session.get("messages")
    messages.append({"role": "user", "content": message.content})

    response = await client.chat.completions.create(
        model="gpt-4o-mini",
        messages=messages,
    )
    reply = response.choices[0].message.content

    messages.append({"role": "assistant", "content": reply})
    cl.user_session.set("messages", messages)

    await cl.Message(content=reply).send()
Here’s what happens when someone uses the chatbot:
- At import time,
AsyncOpenAIreads theOPENAI_API_KEYenvironment variable and constructs the client - When a new chat session opens,
@cl.on_chat_startinitializes an empty message list for that session - When the user types something,
@cl.on_messageappends it to the history, sends the whole conversation togpt-4o-mini, stores the reply, and displays it
Before containerizing, let’s test it locally first. Export your OpenAI key:
export OPENAI_API_KEY=sk-...
Then run the app:
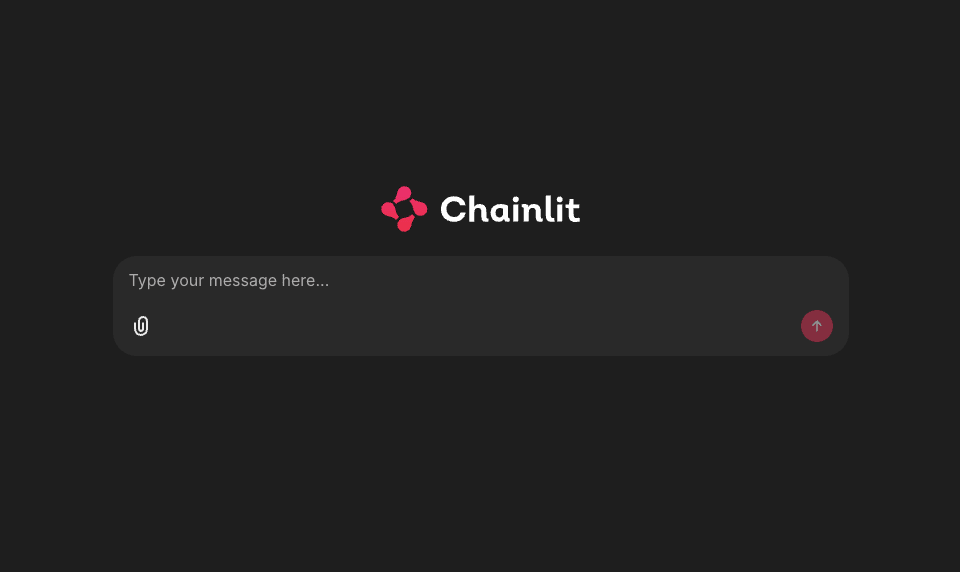
chainlit run app.py
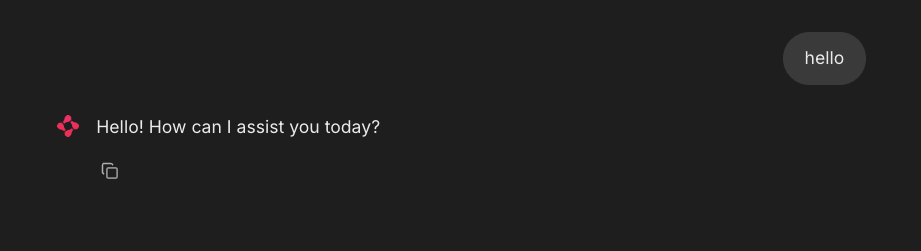
Open http://localhost:8000, you should see the Chainlit welcome screen.
The Dockerfile
Pin every dependency in a requirements.txt so the build is reproducible:
# requirements.txt
chainlit==2.11.1
openai==2.16.0
Create a Dockerfile to build the image:
# Dockerfile
FROM python:3.11-slim

WORKDIR /app

COPY requirements.txt .
RUN pip install --no-cache-dir -r requirements.txt

COPY app.py .

EXPOSE 8000
CMD ["chainlit", "run", "app.py", "--host", "0.0.0.0", "--port", "8000", "-h"]
Here’s what each step does:
- Pulls
python:3.11-slimas the base image - Installs the pinned dependencies from
requirements.txt - Copies in
app.py - Starts Chainlit on port 8000 when the container runs
Build the image:
docker build -t llm-chatbot:fat .
Verify the image size:
docker images llm-chatbot:fat
Around 300 MB. Let’s see if we can shrink it with SlimToolkit.
Slim the Image
To slim the image, start with the basic command:
slim build \
    --target llm-chatbot:fat \
    --tag llm-chatbot:slim \
    --env OPENAI_API_KEY=$OPENAI_API_KEY
Each flag plays a role in the slim build:
--target llm-chatbot:fat: tells slim which image to minify--tag llm-chatbot:slim: names the output image--env OPENAI_API_KEY=$OPENAI_API_KEY: sets the env var inside slim’s probe container so the module-levelAsyncOpenAI()can construct at import time
Here’s what happens when you run the command:
- Slim inspects the fat image
- Starts it in a sandbox
- Sends a
GET /probe and records every file the container touches - Builds a slim image containing only those files
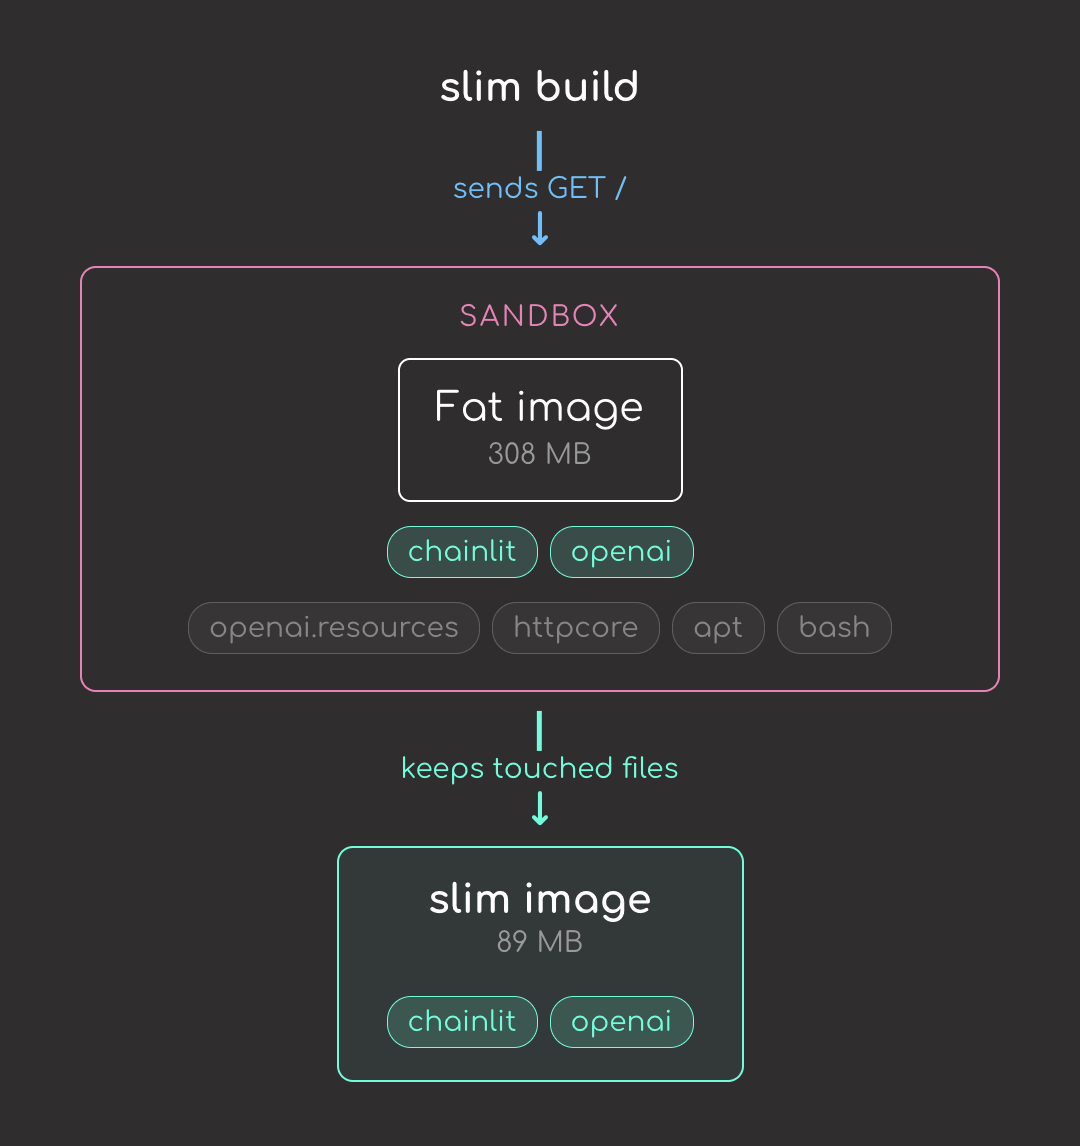
But the default GET / only loads the chat UI shell. It doesn’t actually send a chat message, so files needed for the chat path (OpenAI’s lazy submodules, httpcore, etc.) get stripped. To trace the chat path too, add --continue-after enter:
slim build \
    --target llm-chatbot:fat \
    --tag llm-chatbot:slim \
    --env OPENAI_API_KEY=$OPENAI_API_KEY \
    --continue-after enter
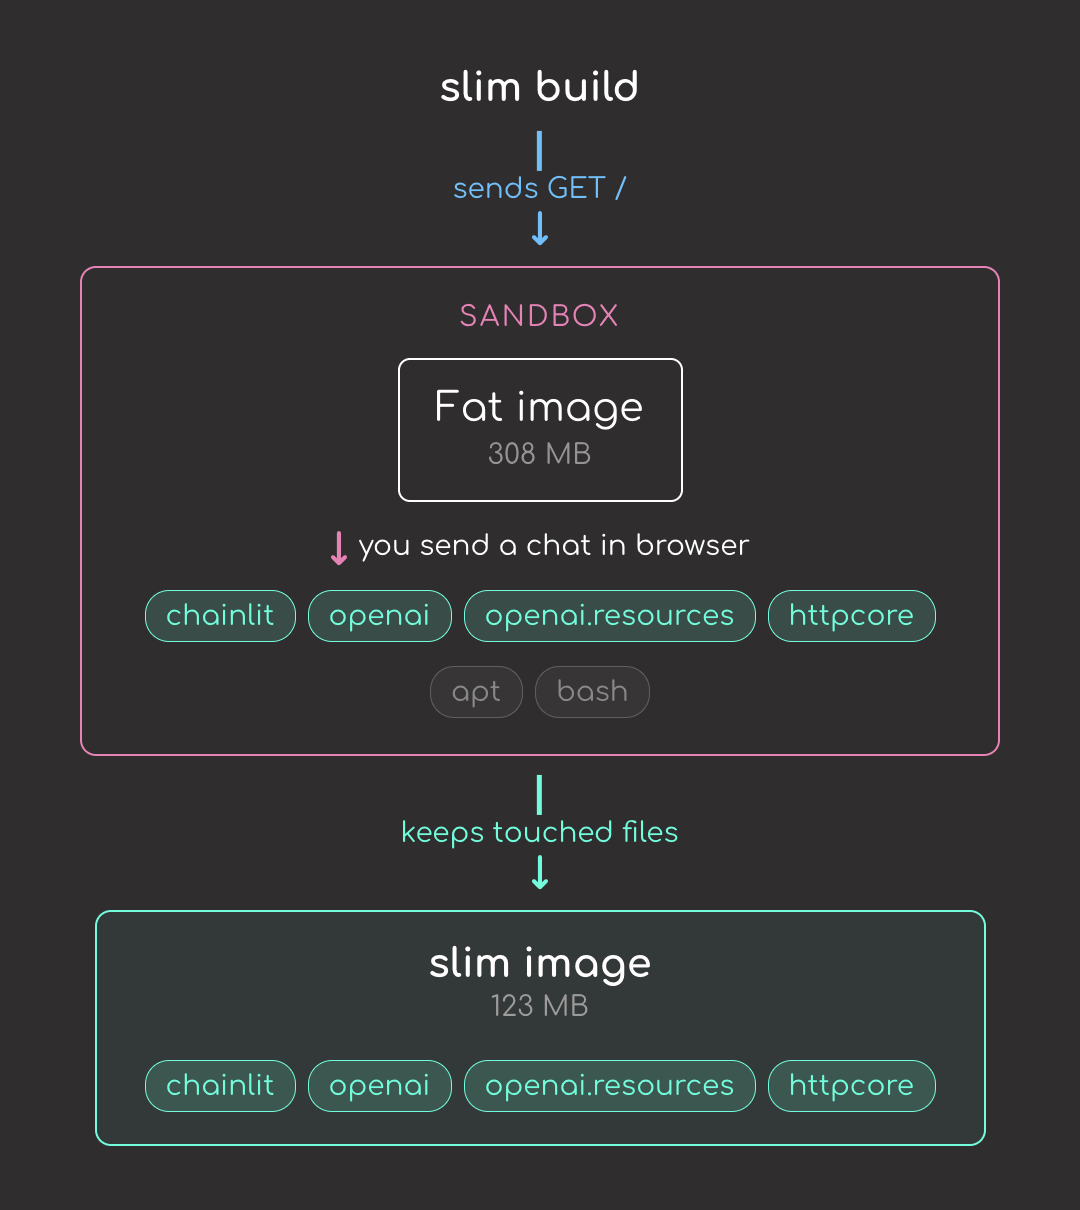
--continue-after enter pauses slim after the default probe so you can open the chatbot in a browser and send a message; this tells slim what files the chat actually needs.
Now that the chat path runs during the probe, slim keeps openai.resources and httpcore in the final image:
Let’s compare both images:
docker images llm-chatbot
Nice! We reduced the image size from 308 MB to 123 MB, about a 2.5x reduction.
Let’s run the slim image with the environment variable and see what happens.
docker run -p 8000:8000 -e OPENAI_API_KEY=$OPENAI_API_KEY llm-chatbot:slim
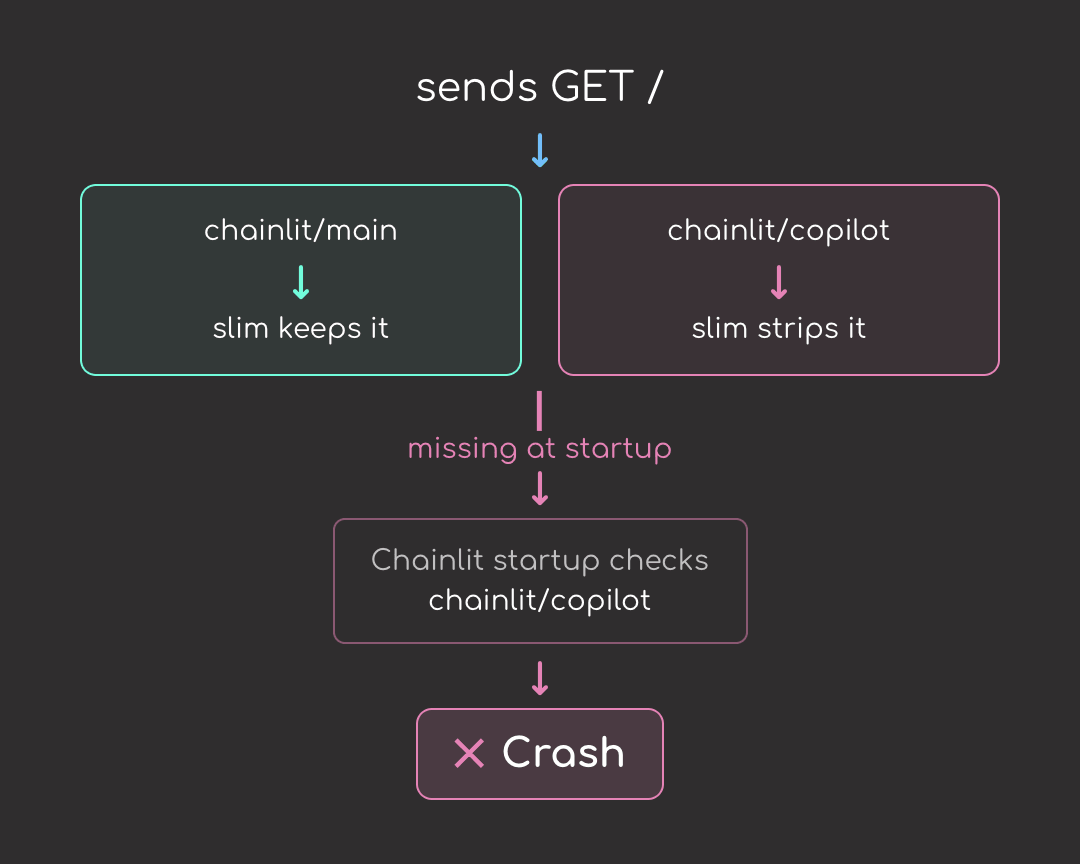
The error comes from a mismatch between Chainlit and slim:
- Chainlit expects
chainlit/copilot/to exist when the server starts - Even with
--continue-after enter, slim removedchainlit/copilot/because the chat you exercised in the browser only loaded the main chat UI. The Copilot widget is a separate Chainlit feature; no file insidechainlit/copilot/was opened during the probe - Now Chainlit’s startup check finds the directory missing and the container crashes
This is not unique to Chainlit or chat-UI frameworks. Any framework that loads features lazily but checks for them at startup is vulnerable. Django’s admin, FastAPI apps with multiple routers, ML serving frameworks with embedded UIs, and plugin systems all hit the same problem.
Add --include-path for the Chainlit Package
The fix is --include-path, which tells SlimToolkit to preserve a path regardless of whether probing touched it. The path that matters is the whole Chainlit package directory, which contains every feature bundle Chainlit ships:
slim build \
    --target llm-chatbot:fat \
    --tag llm-chatbot:slim \
    --include-path /usr/local/lib/python3.11/site-packages/chainlit \
    --continue-after enter \
    --env OPENAI_API_KEY=$OPENAI_API_KEY
Compare the images again:
docker images llm-chatbot
Re-run the image to confirm it works:
docker run -p 8000:8000 -e OPENAI_API_KEY=$OPENAI_API_KEY llm-chatbot:slim
With the chainlit directory preserved, the slim container starts and runs as expected.
Inspecting the Result with slim xray
To see exactly which files slim stripped, run slim xray against both images. It reverse-engineers a built image into a JSON report listing every file, its size, and the layer it came from. Slim always writes its output to slim.report.json, so rename the first report before the second run overwrites it:
slim xray --target llm-chatbot:fat
mv slim.report.json fat.report.json

slim xray --target llm-chatbot:slim
Each report is several megabytes of JSON, which makes manual comparison painful. To handle that, I packaged the diff and summary steps into compare.sh:
bash compare.sh
Here are the biggest deletions, grouped by bucket:
| Removed | Size | Bucket |
|---|---|---|
/usr/bin/perl | 3.8 MB | OS cruft |
libapt-pkg.so | 2.4 MB | OS cruft (apt) |
ensurepip/pip-24.0.whl | 2.1 MB | Python build leftover |
libdb-5.3.so | 1.8 MB | OS cruft (apt) |
/usr/bin/sqv | 1.6 MB | OS cruft (apt’s PGP verifier) |
/usr/bin/bash | 1.4 MB | OS cruft |
ensurepip/setuptools-79.0.1.whl | 1.3 MB | Python build leftover |
multidict/_multidict.so | 923 kB | Unused part of aiohttp |
jiter/jiter.so | 880 kB | Unused part of openai |
pydoc_data/topics.py | 775 kB | Python build leftover |
aiohttp/_http_writer.so | 600 kB | Unused part of aiohttp |
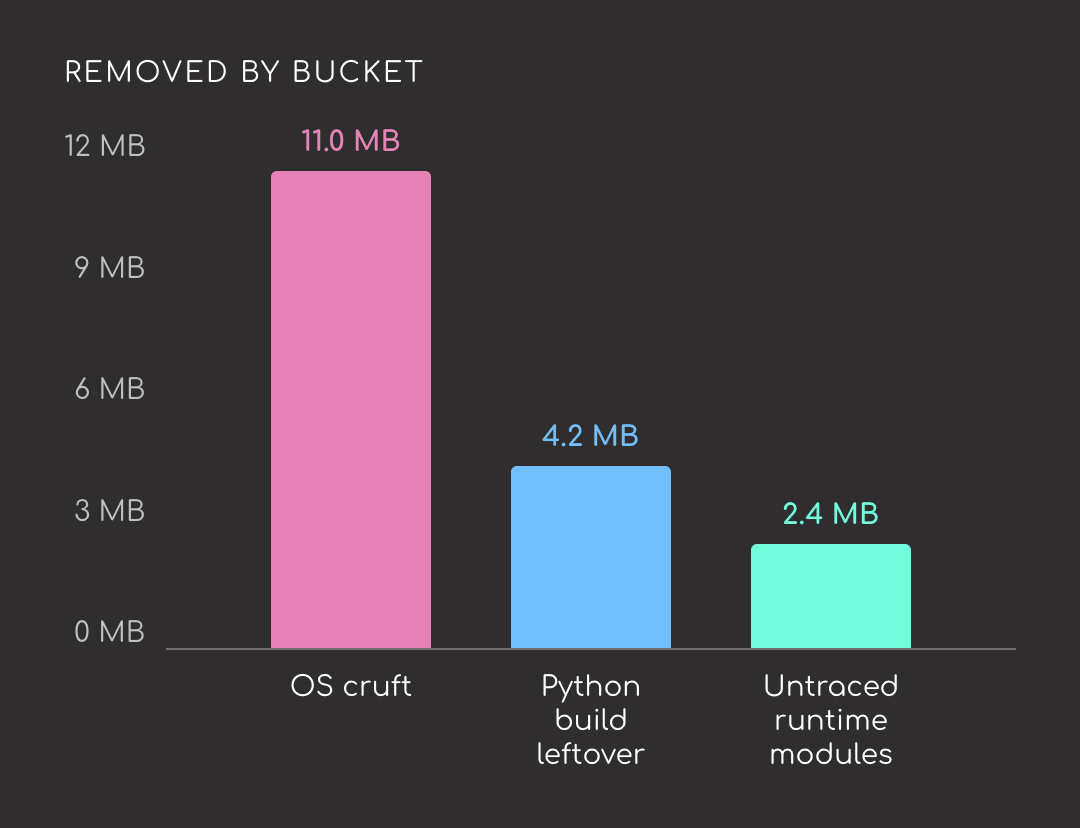
The biggest savings come from the Debian base image, not from the Python packages. Of the top 11 deletions:
- Five are base-image binaries:
perl,bash,libapt-pkg,libdb-5.3,sqv - Three are install-time leftovers: bundled pip and setuptools wheels, plus the
pydochelp-text database - Three are write-side or helper modules of runtime libraries the probe didn’t exercise:
aiohttp/_http_writer,multidict,jiter
Stay Current with CodeCut
Easy-to-digest articles on Python, AI, and open-source tools. Delivered twice a week.
Final Thoughts
A single slim build command took this chatbot from 308 MB to 163 MB. That is one data point on one image. Your numbers will likely look different. The wider the gap between what your image installs and what it actually runs at runtime, the bigger the reduction tends to be. Give it a try on your own images and see what kind of improvement you get.
Related Tutorials
- How to Test GitHub Actions Locally with act: Iterate on a slim-build CI workflow locally before pushing.
- Unregistry: Skip the Registry, Deploy Docker Images Directly: Deploy the slimmed image straight to a server, no registry required.
📚 Want to go deeper? Learning new techniques is the easy part. Knowing how to structure, test, and deploy them is what separates side projects from real work. My book shows you how to build data science projects that actually make it to production. Get the book →