Generic selectors
Exact matches only
Search in title
Search in content
Post Type Selectors
Filter by Categories
About Article
Analyze Data
Archive
Best Practices
Better Outputs
Blog
Code Optimization
Code Quality
Command Line
Daily tips
Dashboard
Data Analysis & Manipulation
Data Engineer
Data Visualization
DataFrame
Delta Lake
DevOps
DuckDB
Environment Management
Feature Engineer
Git
Jupyter Notebook
LLM
LLM Tools
Machine Learning
Machine Learning & AI
Machine Learning Tools
Manage Data
MLOps
Natural Language Processing
NumPy
Pandas
Polars
PySpark
Python Helpers
Python Tips
Python Utilities
Scrape Data
SQL
Testing
Time Series
Tools
Visualization
Visualization & Reporting
Workflow & Automation
Workflow Automation

Python Utilities

Simplifying Type Annotations with MonkeyType

Writing type annotations manually for existing Python code can be a time-consuming task, leading many developers to skip this important step. However, omitting type annotations can reduce code readability and make it harder to catch type-related bugs through static analysis.

Fortunately, MonkeyType simplifies the process of adding type annotations by automatically generating draft annotations based on the types collected at runtime. This saves time and effort compared to manual annotation.

Example Usage

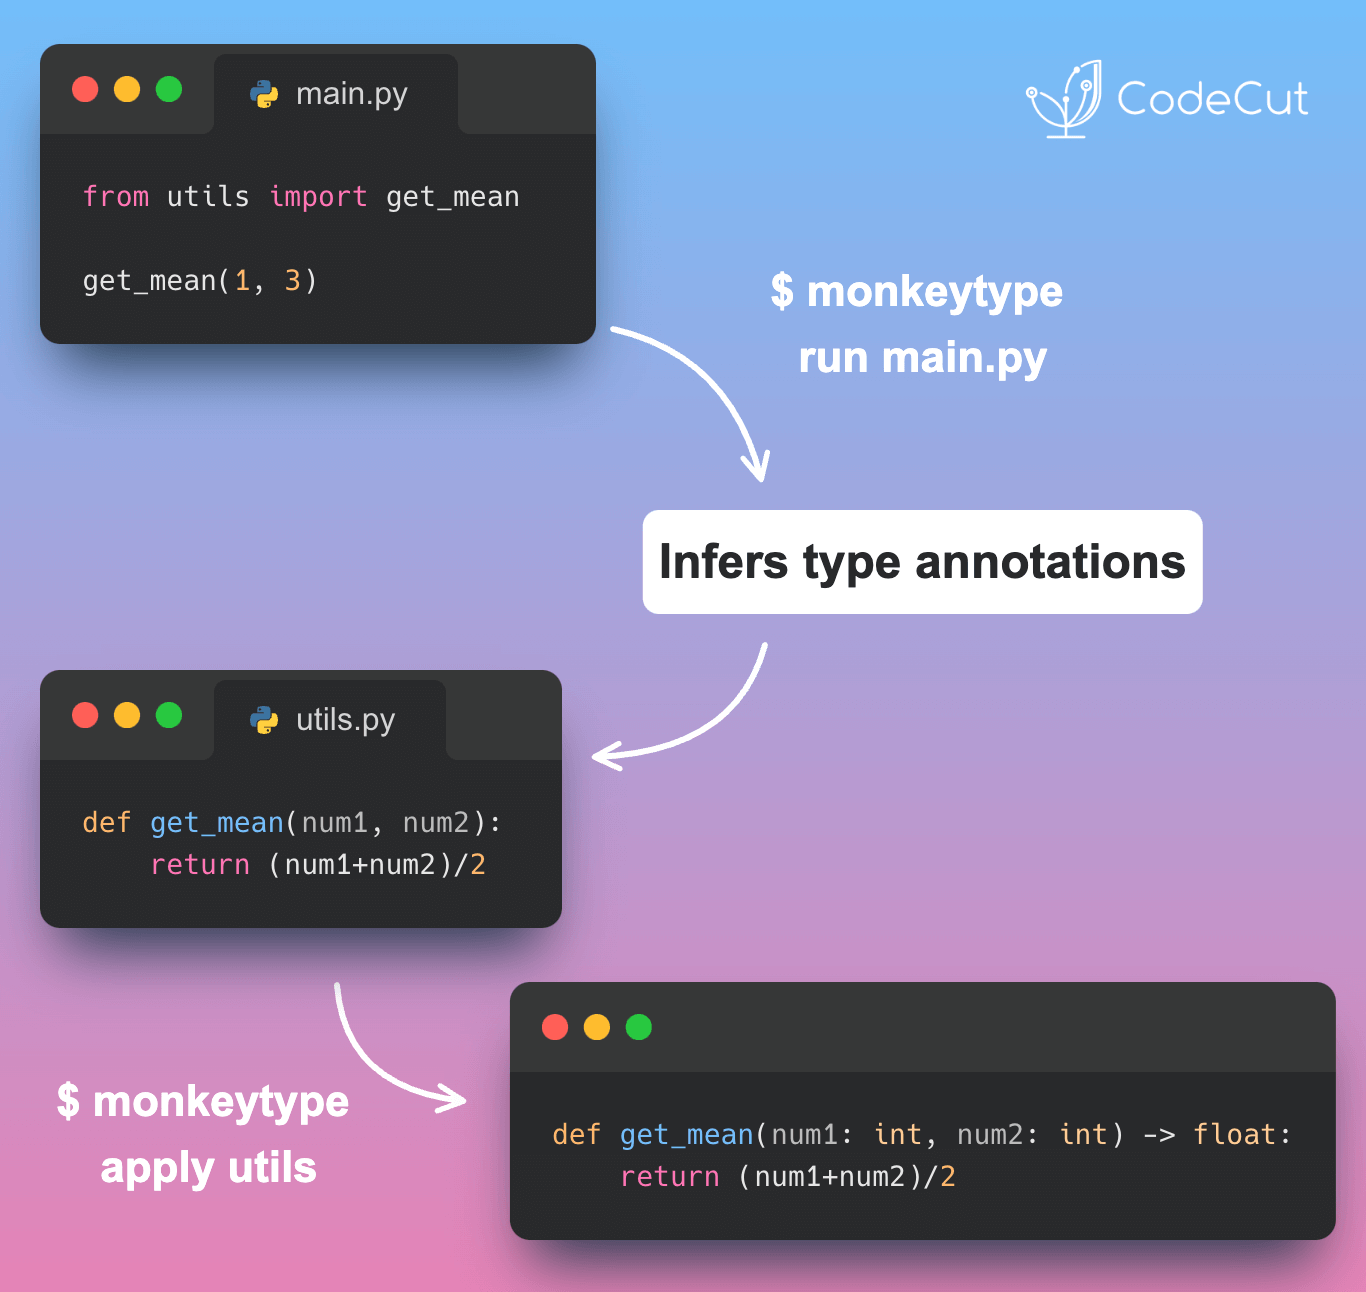
Let’s say we have two files inside the folder monkey_example: utils.py and main.py.

utils.py contains the get_mean function:

def get_mean(num1, num2):
return (num1+num2)/2

main.py calls the get_mean function:

from utils import get_mean

get_mean(1, 3)

We can infer the type annotation of get_mean in utils.py by running main.py with MonkeyType:

monkeytype run main.py

Then, we can generate a stub file for the utils module:

monkeytype stub utils

This will output:

def get_mean(num1: int, num2: int) -> float: …

Alternatively, we can apply the type annotations directly to the code:

monkeytype apply utils

This will modify utils.py to:

def get_mean(num1: int, num2: int) -> float:
return (num1+num2)/2

Limitations

While MonkeyType makes it easy to add annotations, those annotations may not always match the full intended capability of the functions. For example, get_mean is capable of handling many more types than just integers. MonkeyType’s annotations are an informative first draft that are meant to be checked and corrected by a developer.

Link to MonkeyType
Favorite

Simplifying Type Annotations with MonkeyType Read More »

Python’s dropwhile: A Clean Approach to Sequential Filtering

The Problem with Manual Iteration

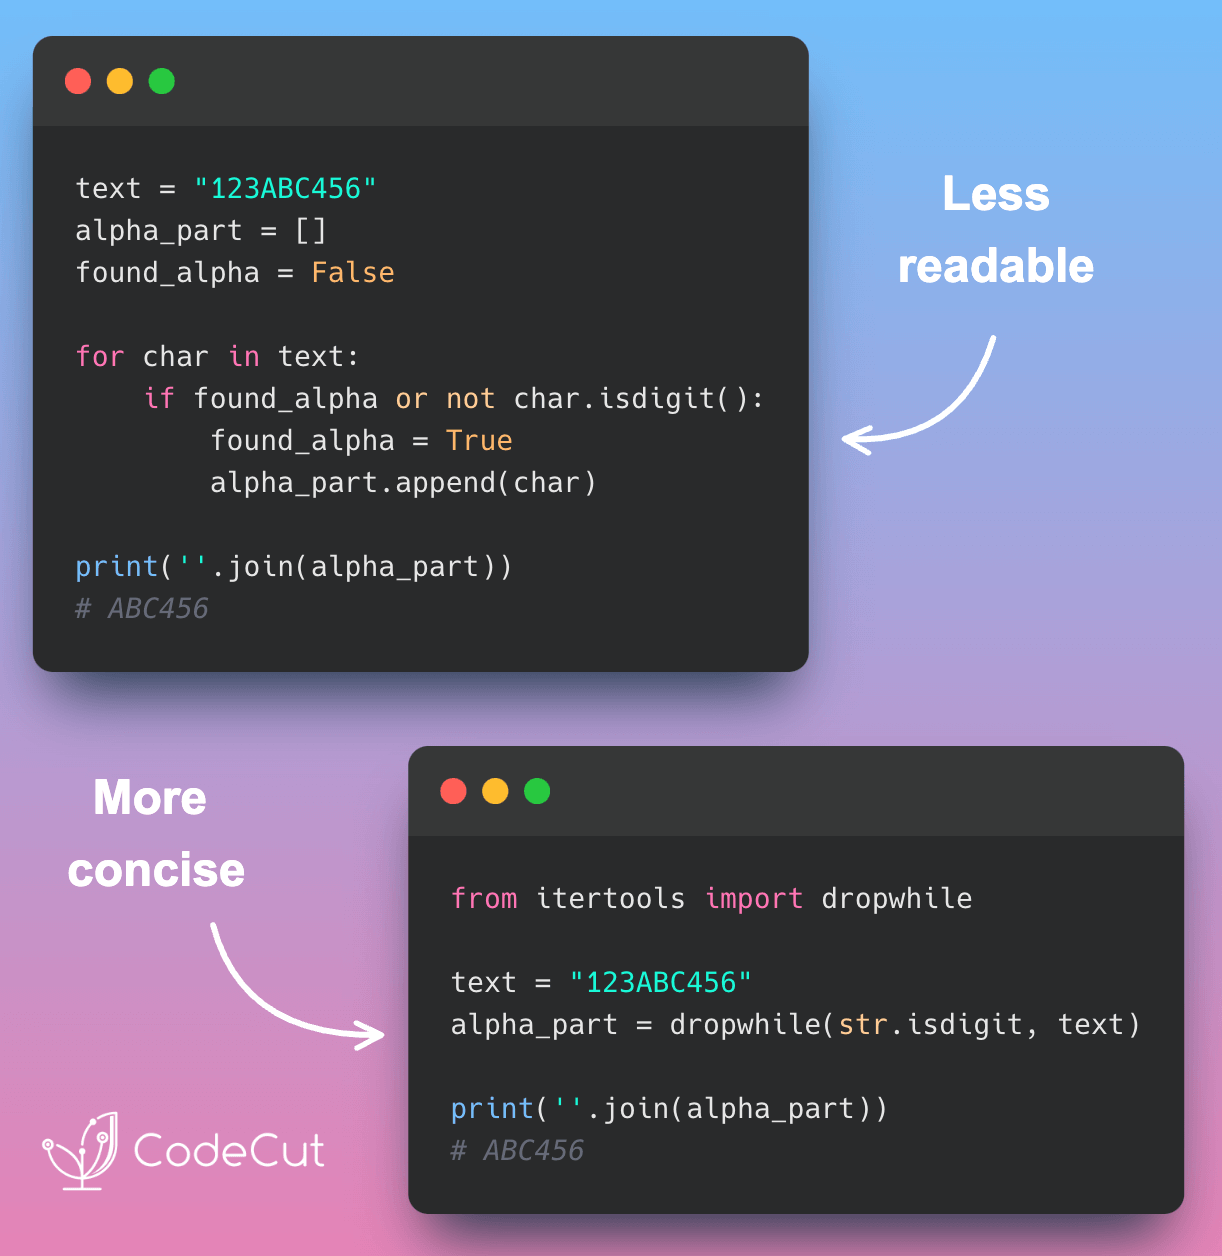
Repeatedly checking elements in an iteration until a condition is met results in verbose and less readable code, especially when you want to skip elements at the beginning of a sequence.

Let’s consider an example where we want to extract the alphabetic part of a string, skipping any leading digits.

text = "123ABC456"
alpha_part = []
found_alpha = False

for char in text:
if found_alpha or not char.isdigit():
found_alpha = True
alpha_part.append(char)

print(''.join(alpha_part))

Output:

ABC456

This code works, but it’s not very concise or readable. We have to manually keep track of whether we’ve found the alphabetic part yet, and the loop is cluttered with conditional statements.

Simplifying with itertools.dropwhile

dropwhile takes two arguments: a predicate function and an iterable. It applies the predicate function to each element of the iterable, skipping elements as long as the predicate returns True. As soon as the predicate returns False, dropwhile starts yielding elements from the iterable.

Now, let’s see how we can simplify the code above using itertools.dropwhile.

from itertools import dropwhile

text = "123ABC456"
alpha_part = dropwhile(str.isdigit, text)

print(''.join(alpha_part))

Output:

ABC456

In this version, we pass a predicate function (str.isdigit) and the text string to dropwhile. It skips digits until it finds a non-digit character, then returns the rest of the string. The resulting code is much more concise and readable.
Favorite

Python’s dropwhile: A Clean Approach to Sequential Filtering Read More »

Simplify Data Validation with Pydantic

When working with data in Python, it’s essential to ensure that the data is valid and consistent. Two popular libraries for working with data in Python are dataclasses and Pydantic. While both libraries provide a way to define and work with structured data, they differ significantly when it comes to data validation.

Dataclasses: Manual Validation Required

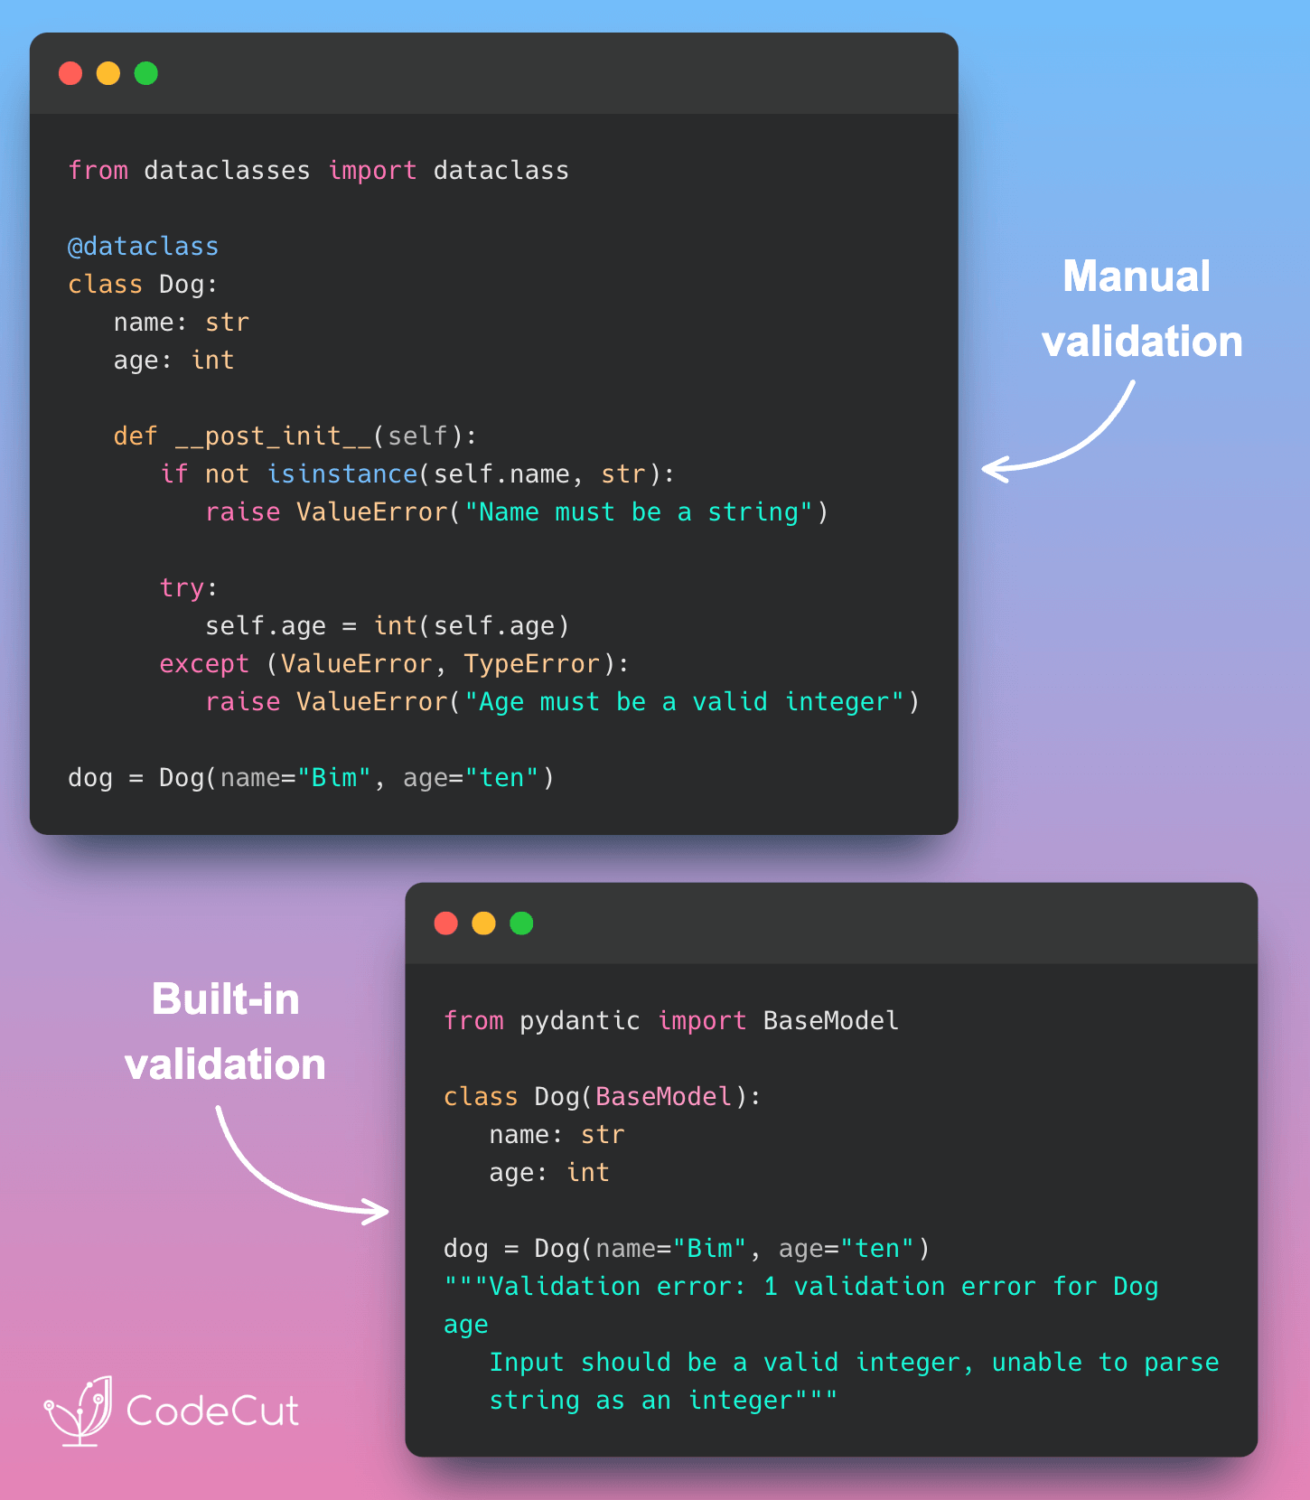
Dataclasses require manual implementation of validation logic. This means that you need to write custom code to validate the data, which can be time-consuming and error-prone.

Here’s an example of how you might implement validation using dataclasses:

from dataclasses import dataclass

@dataclass
class Dog:
name: str
age: int

def __post_init__(self):
if not isinstance(self.name, str):
raise ValueError("Name must be a string")

try:
self.age = int(self.age)
except (ValueError, TypeError):
raise ValueError("Age must be a valid integer, unable to parse string as an integer")

# Usage
try:
dog = Dog(name="Bim", age="ten")
except ValueError as e:
print(f"Validation error: {e}")

Validation error: Age must be a valid integer, unable to parse string as an integer

As you can see, implementing validation using dataclasses requires a significant amount of custom code.

Pydantic: Built-in Validation

Pydantic, on the other hand, offers built-in validation that automatically validates data and provides informative error messages. This makes Pydantic particularly useful when working with data from external sources.

Here’s an example of how you might define a Dog class using Pydantic:

from pydantic import BaseModel

class Dog(BaseModel):
name: str
age: int

try:
dog = Dog(name="Bim", age="ten")
except ValueError as e:
print(f"Validation error: {e}")

Validation error: 1 validation error for Dog
age
Input should be a valid integer, unable to parse string as an integer [type=int_parsing, input_value='ten', input_type=str]

As you can see, Pydantic automatically validates the data and provides a detailed error message when the validation fails.

Conclusion

While dataclasses require manual implementation of validation logic, Pydantic offers built-in validation that automatically validates data and provides informative error messages. This makes Pydantic a more convenient and efficient choice for working with data in Python, especially when working with data from external sources.

Link to Pydantic.

Favorite

Simplify Data Validation with Pydantic Read More »

Simplify Python Logging with Loguru

Have you ever found yourself using print() instead of a proper logger due to the hassle of setup?

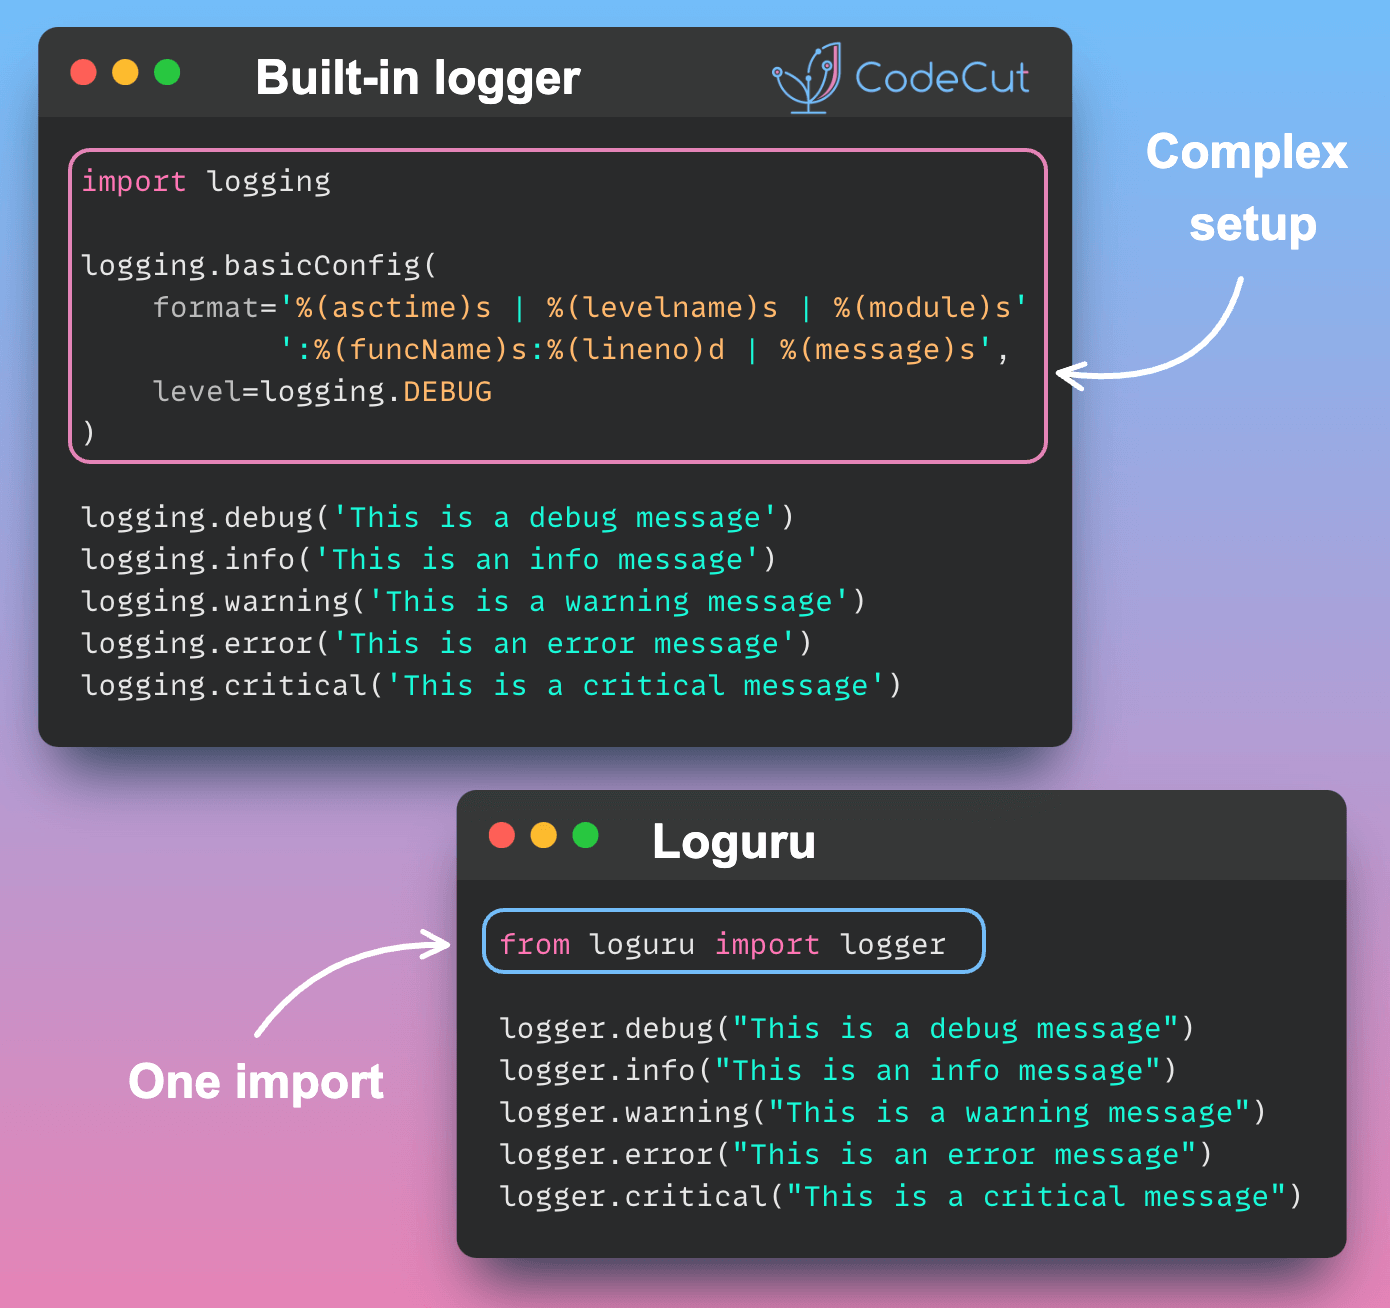
With Loguru, a single import is all you need to begin logging with pre-configured color and format settings.

Below is an example of how to use the standard Python logging library and Loguru to log messages at different levels.

Standard Python Logging Library

import logging

logging.basicConfig(format='%(asctime)s | %(levelname)s | %(module)s:%(funcName)s:%(lineno)d | %(message)s', level=logging.DEBUG)

def main():
logging.debug('This is a debug message')
logging.info('This is an info message')
logging.warning('This is a warning message')
logging.error('This is an error message')
logging.critical('This is a critical message')

if __name__ == '__main__':
main()

Output:

2023-03-13 08:46:30,802 | DEBUG | logging_example:main:6 | This is a debug message
2023-03-13 08:46:30,802 | INFO | logging_example:main:7 | This is an info message
2023-03-13 08:46:30,802 | WARNING | logging_example:main:8 | This is a warning message
2023-03-13 08:46:30,802 | ERROR | logging_example:main:9 | This is an error message
2023-03-13 08:46:30,802 | CRITICAL | logging_example:main:10 | This is a critical message

Loguru

from loguru import logger

def main():
logger.debug("This is a debug message")
logger.info("This is an info message")
logger.warning("This is a warning message")
logger.error("This is an error message")
logger.critical("This is a critical message")

if __name__ == '__main__':
main()

Output:

As you can see, Loguru requires minimal setup and configuration, making it easy to get started with logging right away. With Loguru, you can focus on writing your application code instead of spending time configuring your logger.

Loguru also offers other features such as descriptive exceptions, lazy evaluation, asynchronous logging, and more.

.stk-af357d7-container{background-color:var(–ast-global-color-0) !important;}.stk-af357d7-container:before{background-color:var(–ast-global-color-0) !important;}.stk-af357d7 .stk-block-call-to-action__content{max-width:700px !important;min-width:auto !important;}
.stk-3e42139 .stk-block-heading__text{color:var(–ast-global-color-4) !important;font-family:”Comfortaa”, Sans-serif !important;}Want the full walkthrough?

.stk-e915396 .stk-block-text__text{color:var(–ast-global-color-4) !important;}Check out our in-depth guide on Simplify Your Python Logging with Loguru.

.stk-c77f1ca {border-top-left-radius:1px !important;border-top-right-radius:1px !important;border-bottom-right-radius:1px !important;border-bottom-left-radius:1px !important;overflow:hidden !important;border-style:solid !important;border-top-width:1px !important;border-right-width:1px !important;border-bottom-width:1px !important;border-left-width:1px !important;}.stk-c77f1ca .stk-button{min-height:0px !important;padding-top:18px !important;padding-right:29px !important;padding-bottom:18px !important;padding-left:29px !important;background:var(–ast-global-color-1) !important;border-top-left-radius:13px !important;border-top-right-radius:13px !important;border-bottom-right-radius:13px !important;border-bottom-left-radius:13px !important;}.stk-c77f1ca .stk-button:before{border-style:solid !important;border-color:var(–ast-global-color-2) !important;border-top-width:1px !important;border-right-width:1px !important;border-bottom-width:1px !important;border-left-width:1px !important;}.stk-c77f1ca .stk-button .stk–inner-svg svg:last-child, .stk-c77f1ca .stk-button .stk–inner-svg svg:last-child :is(g, path, rect, polygon, ellipse){fill:var(–ast-global-color-1) !important;}.stk-c77f1ca .stk-button__inner-text{font-size:17px !important;}@media screen and (max-width: 1023px){.stk-c77f1ca .stk-button__inner-text{font-size:17px !important;}}View the in-depth guide

Link to loguru.
Favorite

Simplify Python Logging with Loguru Read More »

pydash: Functional Programming in Python Made Easy

Working with complex data structures and performing functional operations in Python often requires repetitive code, reducing readability and slowing development.

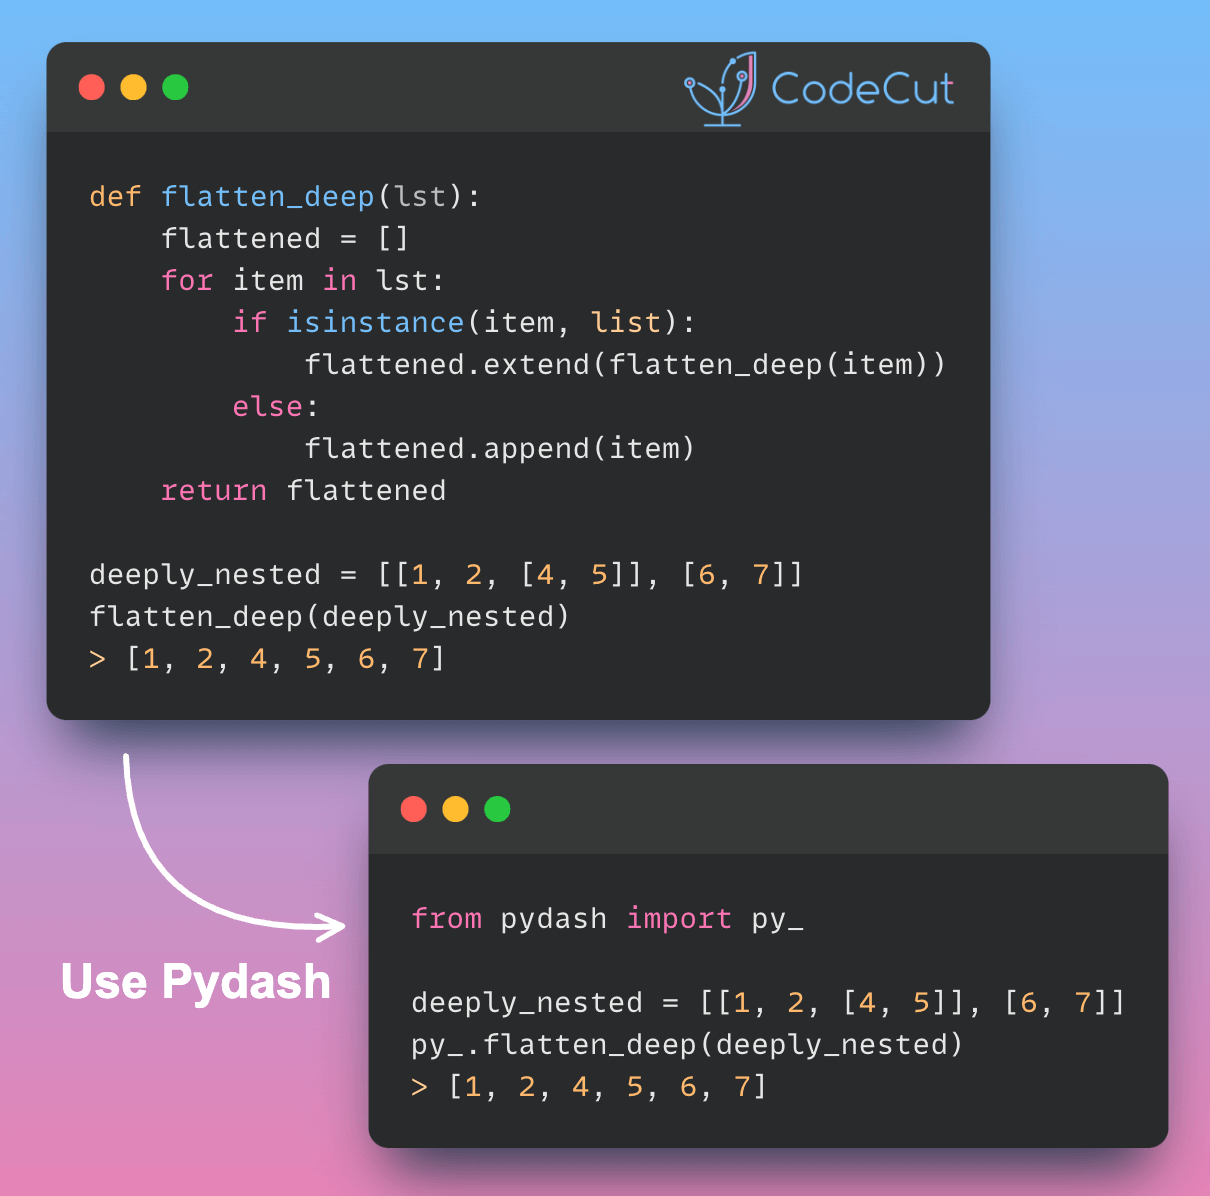
pydash solves this by offering utility functions that simplify operations on lists, dictionaries, and other data structures. This enables a more expressive and concise approach to data manipulation.

Working with Lists

pydash provides several useful functions for manipulating lists:

Flattening Nested Lists

Use flatten to flatten a single level of nesting:

from pydash import py_

nested_list = [[1, 2], [3, 4, 5]]
flattened = py_.flatten(nested_list)
print(flattened) # [1, 2, 3, 4, 5]

For deeply nested lists, use flatten_deep:

deeply_nested = [[1, 2, [4, 5]], [6, 7]]
fully_flattened = py_.flatten_deep(deeply_nested)
print(fully_flattened) # [1, 2, 4, 5, 6, 7]

Chunking Lists

Split a list into smaller groups using chunk:

numbers = [1, 2, 3, 4, 5]
chunked = py_.chunk(numbers, 2)
print(chunked) # [[1, 2], [3, 4], [5]]

Working with Dictionaries

pydash offers convenient methods for dictionary manipulation:

Omitting Dictionary Attributes

Remove specific keys from a dictionary using omit:

fruits = {"name": "apple", "color": "red", "taste": "sweet"}
without_name = py_.omit(fruits, "name")
print(without_name) # {'color': 'red', 'taste': 'sweet'}

Accessing Nested Dictionary Attributes

Use get to easily access nested dictionary values:

apple = {
"price": {
"in_season": {"store": {"Walmart": [2, 4], "Aldi": 1}},
"out_of_season": {"store": {"Walmart": [3, 5], "Aldi": 2}},
}
}

walmart_price = py_.get(apple, "price.in_season.store.Walmart[0]")
print(walmart_price) # 2

Working with Lists of Dictionaries

pydash shines when working with lists of dictionaries:

Finding Item Index

Use find_index to locate items based on a condition:

fruits = [
{"name": "apple", "price": 2},
{"name": "orange", "price": 2},
{"name": "grapes", "price": 4},
]

apple_index = py_.find_index(fruits, lambda fruit: fruit["name"] == "apple")
print(apple_index) # 0

Filtering Objects

Filter objects based on matching attributes:

apples = py_.filter_(fruits, {"name": "apple"})
print(apples) # [{'name': 'apple', 'price': 2}]

Mapping Nested Values

Extract nested values from a list of dictionaries:

nested_fruits = [
{"apple": {"price": [0, 1], "color": "red"}},
{"apple": {"price": [2, 3], "color": "green"}},
]

second_prices = py_.map_(nested_fruits, "apple.price[1]")
print(second_prices) # [1, 3]

Function Utilities

pydash provides utilities for working with functions:

Executing Functions Multiple Times

Use times to run a function a specified number of times:

messages = py_.times(3, lambda i: f"Message {i}")
print(messages) # ['Message 0', 'Message 1', 'Message 2']

Method Chaining

pydash allows you to chain multiple operations for more expressive code:

fruits = ["apple", "orange", "grapes"]

result = (
py_.chain(fruits)
.without("grapes")
.reject(lambda fruit: fruit.startswith("a"))
.value()
)

print(result) # ['orange']

You can also use custom functions in chains:

def get_price(fruit):
prices = {"apple": 2, "orange": 2, "grapes": 4}
return prices[fruit]

total_price = py_.chain(fruits).map(get_price).sum().value()
print(total_price) # 8

Link to pydash.
Favorite

pydash: Functional Programming in Python Made Easy Read More »

Efficient Looping in Python with itertools

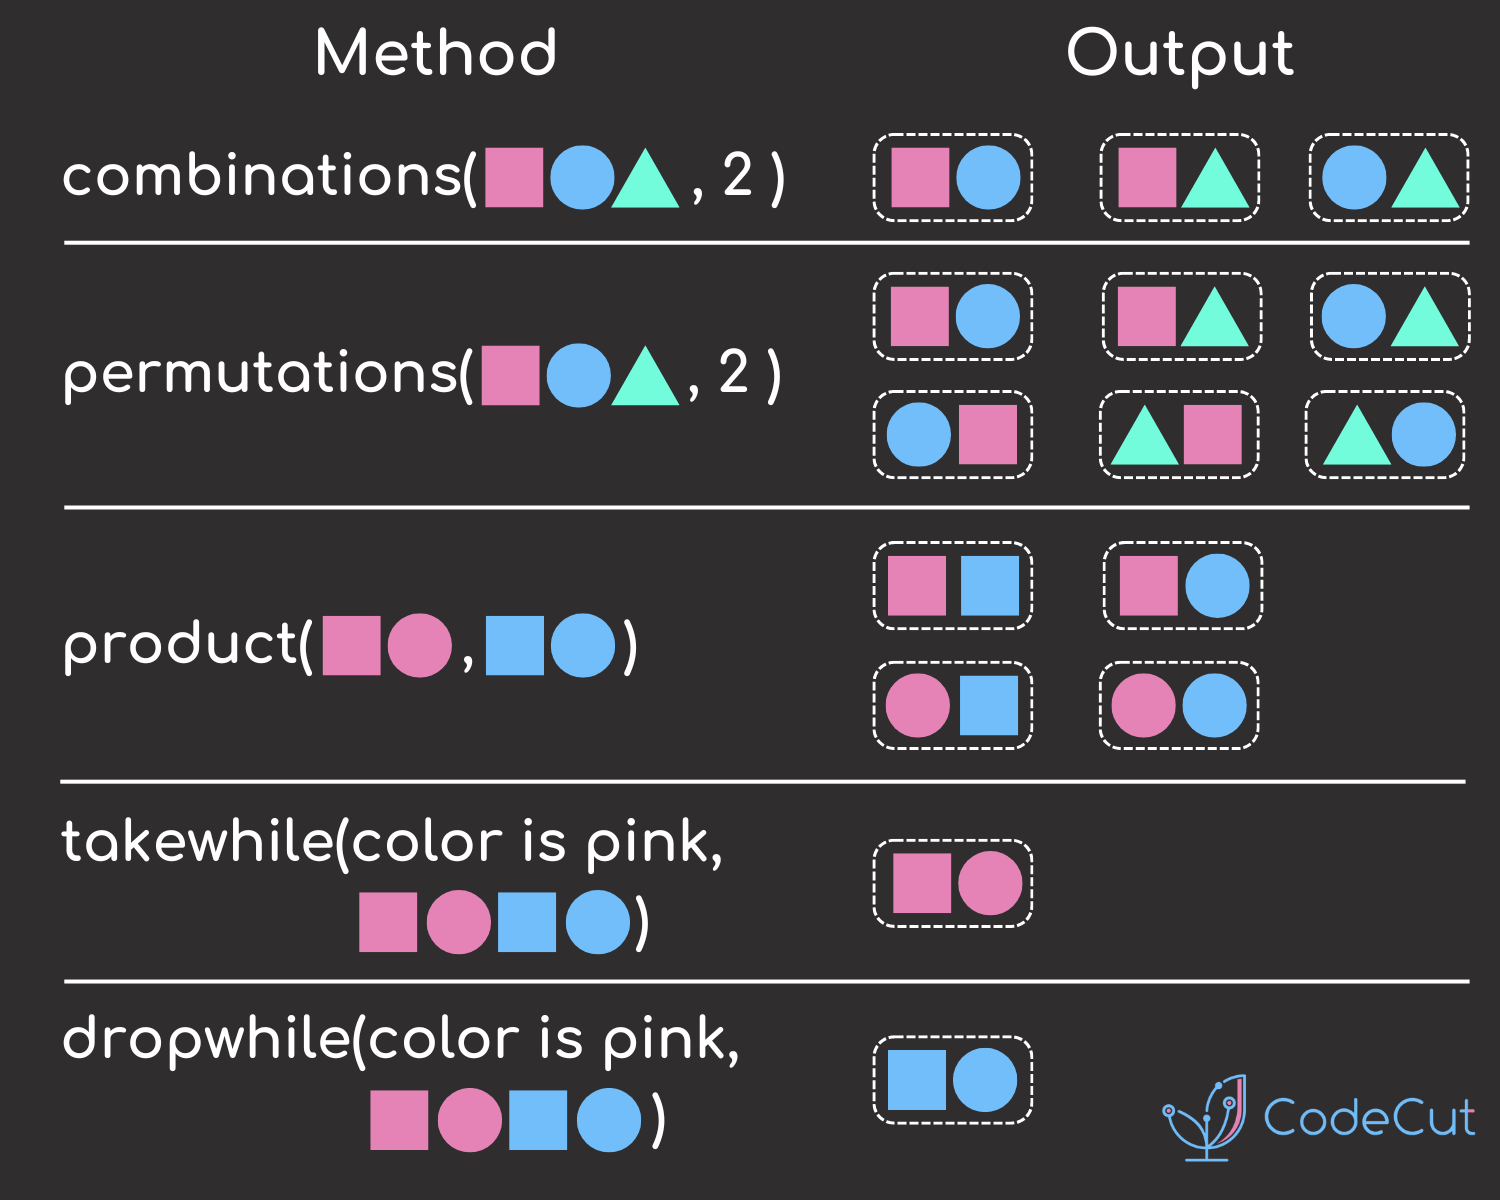
Python’s itertools module is a powerful tool that provides efficient looping and data manipulation techniques. By leveraging itertools, you can simplify your code, improve performance, and write more readable Python programs.

For more helpful Python tools and utilities, check out my collection of posts here.

In this post, we’ll explore several of the most useful functions from itertools and demonstrate how they can streamline common programming tasks.

itertools.combinations: Elegant Pair Generation

When you need to iterate through pairs of values from a list where order doesn’t matter (i.e., (a, b) is the same as (b, a)), itertools.combinations is the perfect tool. Without itertools, you might write nested loops like this:

num_list = [1, 2, 3]
for i in num_list:
for j in num_list:
if i < j:
print((i, j))

Output:

(1, 2)
(1, 3)
(2, 3)

This approach works, but it’s inefficient and verbose. With itertools.combinations, you can achieve the same result in a much more concise way:

from itertools import combinations

num_list = [1, 2, 3]
comb = combinations(num_list, 2)
for pair in comb:
print(pair)

Output:

(1, 2)
(1, 3)
(2, 3)

By using itertools.combinations, you eliminate the need for nested loops and conditional checks. The function generates all possible combinations of the elements in the list, allowing you to focus on the logic instead of the mechanics of iteration.

itertools.product: Simplifying Nested Loops

When you’re working with multiple parameters and need to explore all combinations of their values, you might find yourself writing deeply nested loops. For example, suppose you’re experimenting with different machine learning model parameters:

params = {
"learning_rate": [1e-1, 1e-2, 1e-3],
"batch_size": [16, 32, 64],
}

for learning_rate in params["learning_rate"]:
for batch_size in params["batch_size"]:
print((learning_rate, batch_size))

Output:

(0.1, 16)
(0.1, 32)
(0.1, 64)
(0.01, 16)

This code quickly becomes unwieldy as the number of parameters increases. Instead, you can use itertools.product to simplify this process:

from itertools import product

params = {
"learning_rate": [1e-1, 1e-2, 1e-3],
"batch_size": [16, 32, 64],
}

for combination in product(*params.values()):
print(combination)

Output:

(0.1, 16)
(0.1, 32)
(0.1, 64)
(0.01, 16)

itertools.product generates the Cartesian product of the input iterables, which means it returns all possible combinations of the parameter values. This allows you to collapse nested loops into a single concise loop, making your code cleaner and easier to maintain.

itertools.starmap: Applying Multi-Argument Functions

The built-in map function is great for applying a function to each element in a list. However, when the function takes multiple arguments, map isn’t sufficient. For example, say you want to apply a multiplication function to pairs of numbers:

def multiply(x: float, y: float):
return x * y

nums = [(1, 2), (4, 2), (2, 5)]
result = list(map(multiply, nums)) # This will raise a TypeError

map doesn’t unpack the tuples, so it tries to pass each tuple as a single argument to multiply, which causes an error. Instead, you can use itertools.starmap, which unpacks the tuples automatically:

from itertools import starmap

def multiply(x: float, y: float):
return x * y

nums = [(1, 2), (4, 2), (2, 5)]
result = list(starmap(multiply, nums))
print(result) # [2, 8, 10]

Output:

[2, 8, 10]

itertools.starmap is particularly useful when you have lists of tuples or other iterable objects that you want to pass as multiple arguments to a function.

itertools.compress: Boolean Filtering

Sometimes, you need to filter a list based on a corresponding list of boolean values. While Python’s list comprehensions can handle this, itertools.compress provides a clean and efficient way to achieve this. Consider the following example:

fruits = ["apple", "orange", "banana", "grape", "lemon"]
chosen = [1, 0, 0, 1, 1]
print(fruits[chosen]) # This will raise a TypeError

You cannot directly use boolean lists as indices in Python. However, itertools.compress allows you to filter the fruits list based on the chosen list of booleans:

from itertools import compress

fruits = ["apple", "orange", "banana", "grape", "lemon"]
chosen = [1, 0, 0, 1, 1]
result = list(compress(fruits, chosen))
print(result) # ['apple', 'grape', 'lemon']

Output:

['apple', 'grape', 'lemon']

This is a clean and efficient way of filtering elements based on a selector list, making your filtering code more readable.

itertools.groupby: Grouping Elements by a Key

When you need to group elements in an iterable by a certain key, itertools.groupby can help. Imagine you have a list of fruits and their prices, and you want to group them by fruit name:

from itertools import groupby

prices = [("apple", 3), ("orange", 2), ("apple", 4), ("orange", 1), ("grape", 3)]
prices.sort(key=lambda x: x[0]) # groupby requires the list to be sorted by the key

for key, group in groupby(prices, key=lambda x: x[0]):
print(key, ":", list(group))

Output:

apple : [('apple', 3), ('apple', 4)]
grape : [('grape', 3)]
orange : [('orange', 2), ('orange', 1)]

itertools.groupby groups consecutive elements that share the same key. In this case, it groups the list of fruit prices by fruit name. Note that the input list must be sorted by the key for groupby to work correctly.

itertools.zip_longest: Zipping Uneven Iterables

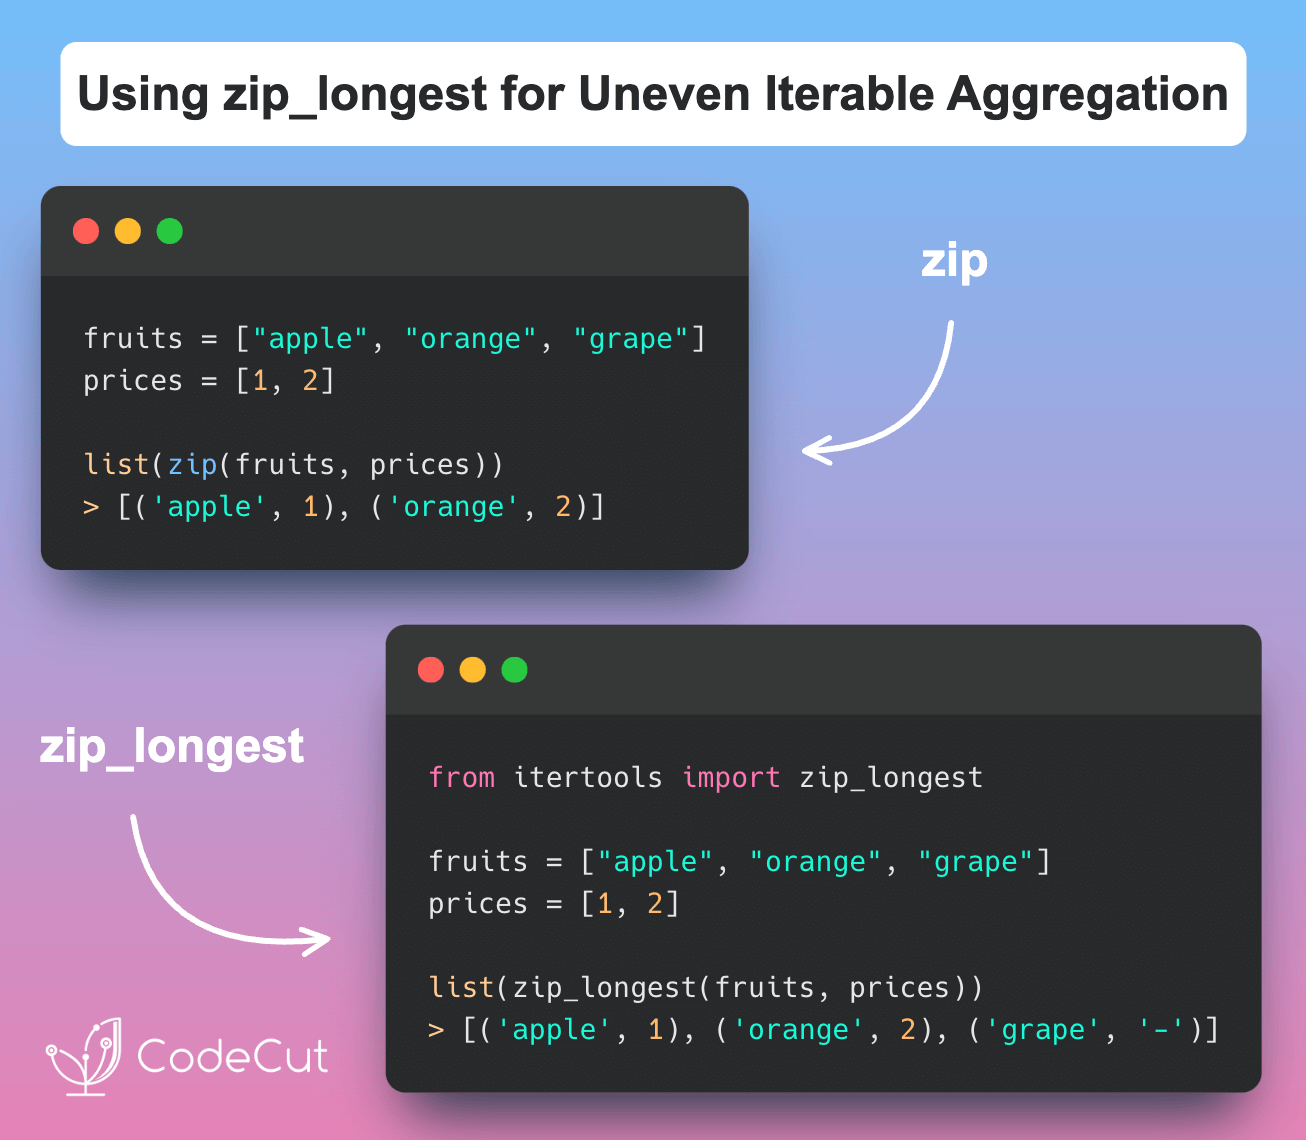
The built-in zip function aggregates elements from two or more iterables, but it stops when the shortest iterable is exhausted. If you want to zip iterables of different lengths and handle the missing values, itertools.zip_longest is the solution:

from itertools import zip_longest

fruits = ["apple", "orange", "grape"]
prices = [1, 2]
result = list(zip_longest(fruits, prices, fillvalue="-"))
print(result)

Output:

[('apple', 1), ('orange', 2), ('grape', '-')]

itertools.zip_longest fills the missing values with a specified fillvalue, ensuring that all iterables are zipped to the length of the longest one.

itertools.dropwhile: Conditional Dropping

When you want to drop elements from an iterable until a condition is false, itertools.dropwhile is the tool for the job. For instance, if you want to drop numbers from a list until you encounter a number greater than or equal to 5:

from itertools import dropwhile

nums = [1, 2, 5, 2, 4]
result = list(dropwhile(lambda n: n < 5, nums))
print(result) # [5, 2, 4]

Output:

[5, 2, 4]

itertools.dropwhile starts yielding elements from the iterable as soon as the condition fails. This is useful for filtering streams of data where you want to skip initial elements based on a condition.

itertools.islice: Efficient Large Data Processing

When dealing with large data streams or files, loading the entire dataset into memory can be inefficient or even impossible. Instead, you can use itertools.islice to process the data in chunks without loading everything into memory. Consider this naive approach:

# Loading all log entries into memory
large_log = [log_entry for log_entry in open("large_log_file.log")]
for entry in large_log[:100]:
process_log_entry(entry)

This code is memory-intensive because it loads the entire file at once. With itertools.islice, you can process only a portion of the data at a time:

import itertools

large_log = (log_entry for log_entry in open("large_log_file.log"))
for entry in itertools.islice(large_log, 100):
process_log_entry(entry)

itertools.islice allows you to process the first 100 entries without loading the entire file, making it ideal for memory-efficient data processing.
Favorite

Efficient Looping in Python with itertools Read More »

Modernize Your Python Code Automatically with pyupgrade

Outdated syntax accumulates over time, creating technical debt. However, manually updating syntax across large codebases is extremely time-consuming and is prone to mistakes.

pyupgrade automates this process by scanning your code and applying modern syntax upgrades. It’s designed to work as both a standalone tool and a pre-commit hook, making it easy to integrate into your development workflow.

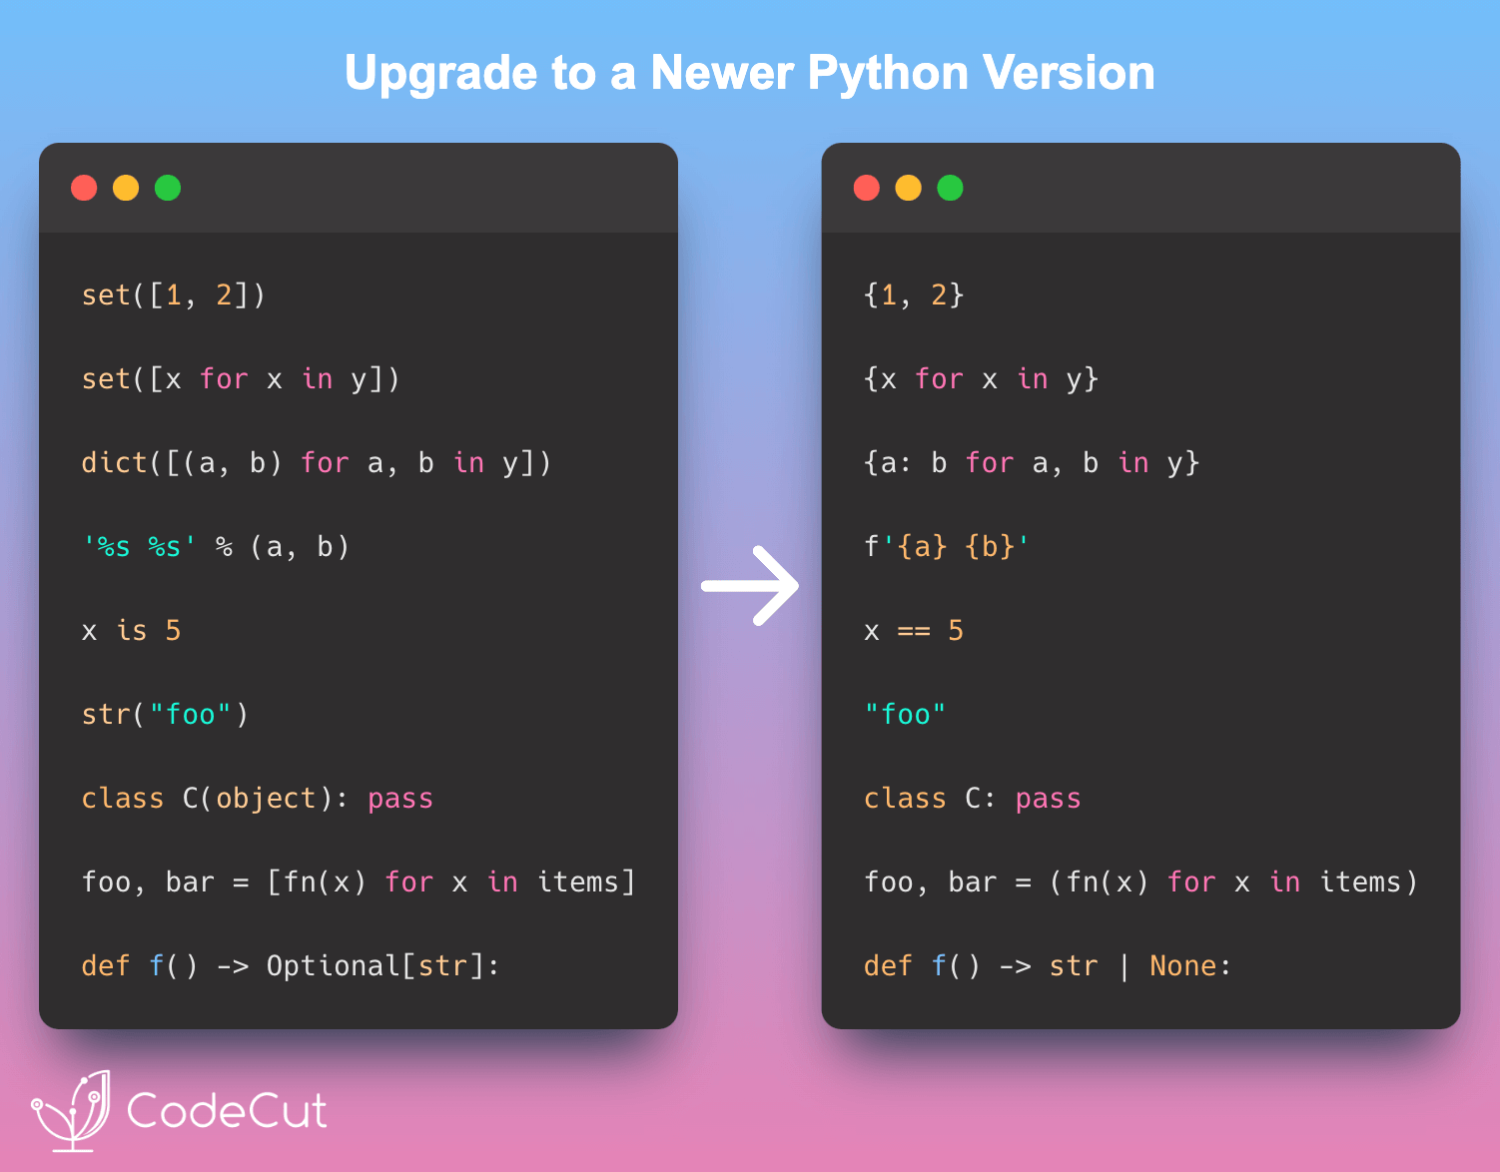
Let’s look at some before-and-after examples to see how pyupgrade can improve your code:

Simplifying Set Creation

# Before
set([1, 2])
# After
{1, 2}

pyupgrade replaces the old set() constructor with a more concise set literal.

Set Comprehensions

# Before
set([x for x in y])
# After
{x for x in y}

It converts list comprehensions inside set() to set comprehensions.

Dictionary Comprehensions

# Before
dict([(a, b) for a, b in y])
# After
{a: b for a, b in y}

List comprehensions creating key-value pairs are converted to dictionary comprehensions.

f-strings

# Before
'%s %s' % (a, b)
# After
f'{a} {b}'

Old-style string formatting is updated to use modern f-strings.

Equality Comparisons

# Before
x is 5
# After
x == 5

Incorrect identity comparisons with literals are fixed to use equality.

Unnecessary Conversions

# Before
str("foo")
# After
"foo"

Redundant string conversions are removed.

Class Definitions

# Before
class C(object): pass
# After
class C: pass

Explicit inheritance from object is removed in Python 3.

Generator Expressions

# Before
foo, bar, baz = [fn(x) for x in items]
# After
foo, bar, baz = (fn(x) for x in items)

List comprehensions used in unpacking are converted to generator expressions for better memory efficiency.

Type Hinting

# Before
def f() -> Optional[str]:
# After
def f() -> str | None:

Type hints are updated to use the new union syntax introduced in Python 3.10.

Link to pyupgrade.
Favorite

Modernize Your Python Code Automatically with pyupgrade Read More »

WAT: Your One-Stop Tool for Python Object Exploration

Inspecting object states and understanding their properties often requires tedious setup of print statements or frequent context switching between code and documentation.

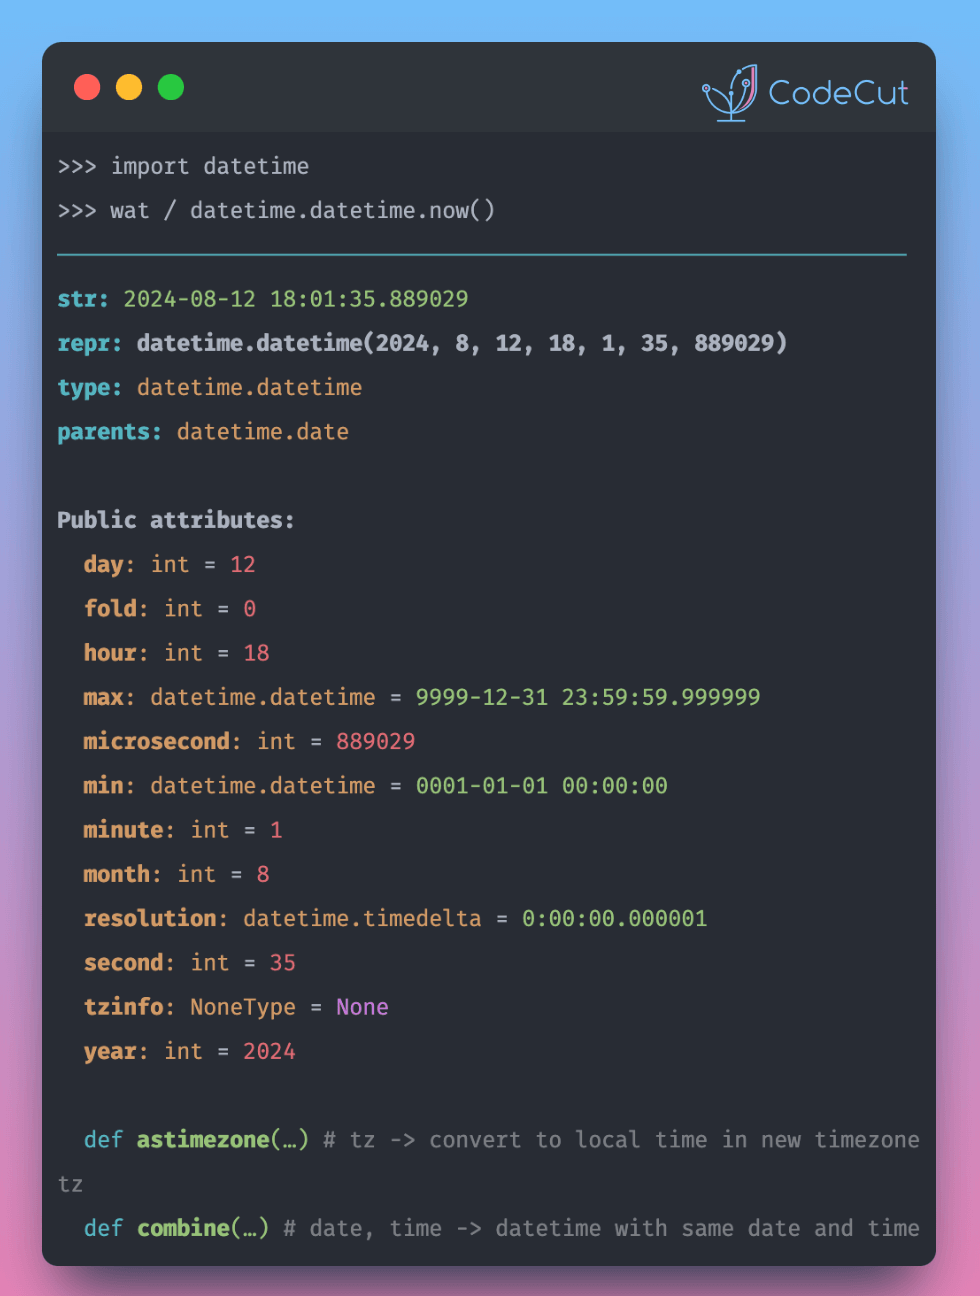
With WAT, you can quickly examine an object’s type, formatted value, variables, methods, parent types, signature, and documentation – all in one view.

To use WAT, simply prepend wat/ to any object you wish to inspect.

import wat
import datetime

wat/datetime.datetime.now()

str: 2024-08-12 18:12:46.949190
repr: datetime.datetime(2024, 8, 12, 18, 12, 46, 949190)
type: datetime.datetime
parents: datetime.date

Public attributes:
day: int = 12
fold: int = 0
hour: int = 18
max: datetime.datetime = 9999-12-31 23:59:59.999999
microsecond: int = 949190
min: datetime.datetime = 0001-01-01 00:00:00
minute: int = 12
month: int = 8
resolution: datetime.timedelta = 0:00:00.000001
second: int = 46
tzinfo: NoneType = None
year: int = 2024

def astimezone(…) # tz -> convert to local time in new timezone tz
def combine(…) # date, time -> datetime with same date and time fields
def ctime(…) # Return ctime() style string.
def date(…) # Return date object with same year, month and day.
def dst(…) # Return self.tzinfo.dst(self).
def fromisocalendar(…) # int, int, int -> Construct a date from the ISO year, week number and weekday.…
def fromisoformat(…) # string -> datetime from a string in most ISO 8601 formats
def fromordinal(…) # int -> date corresponding to a proleptic Gregorian ordinal.
def fromtimestamp(…) # timestamp[, tz] -> tz's local time from POSIX timestamp.
def isocalendar(…) # Return a named tuple containing ISO year, week number, and weekday.
def isoformat(…) # [sep] -> string in ISO 8601 format, YYYY-MM-DDT[HH[:MM[:SS[.mmm[uuu]]]]][+HH:MM].…
def isoweekday(…) # Return the day of the week represented by the date.…
def now(tz=None) # Returns new datetime object representing current time local to tz.…
def replace(…) # Return datetime with new specified fields.
def strftime(…) # format -> strftime() style string.
def strptime(…) # string, format -> new datetime parsed from a string (like time.strptime()).
def time(…) # Return time object with same time but with tzinfo=None.
def timestamp(…) # Return POSIX timestamp as float.
def timetuple(…) # Return time tuple, compatible with time.localtime().
def timetz(…) # Return time object with same time and tzinfo.
def today(…) # Current date or datetime: same as self.__class__.fromtimestamp(time.time()).
def toordinal(…) # Return proleptic Gregorian ordinal. January 1 of year 1 is day 1.
def tzname(…) # Return self.tzinfo.tzname(self).
def utcfromtimestamp(…) # Construct a naive UTC datetime from a POSIX timestamp.
def utcnow(…) # Return a new datetime representing UTC day and time.
def utcoffset(…) # Return self.tzinfo.utcoffset(self).
def utctimetuple(…) # Return UTC time tuple, compatible with time.localtime().
def weekday(…) # Return the day of the week represented by the date.…

Link to WAT.
Favorite

WAT: Your One-Stop Tool for Python Object Exploration Read More »

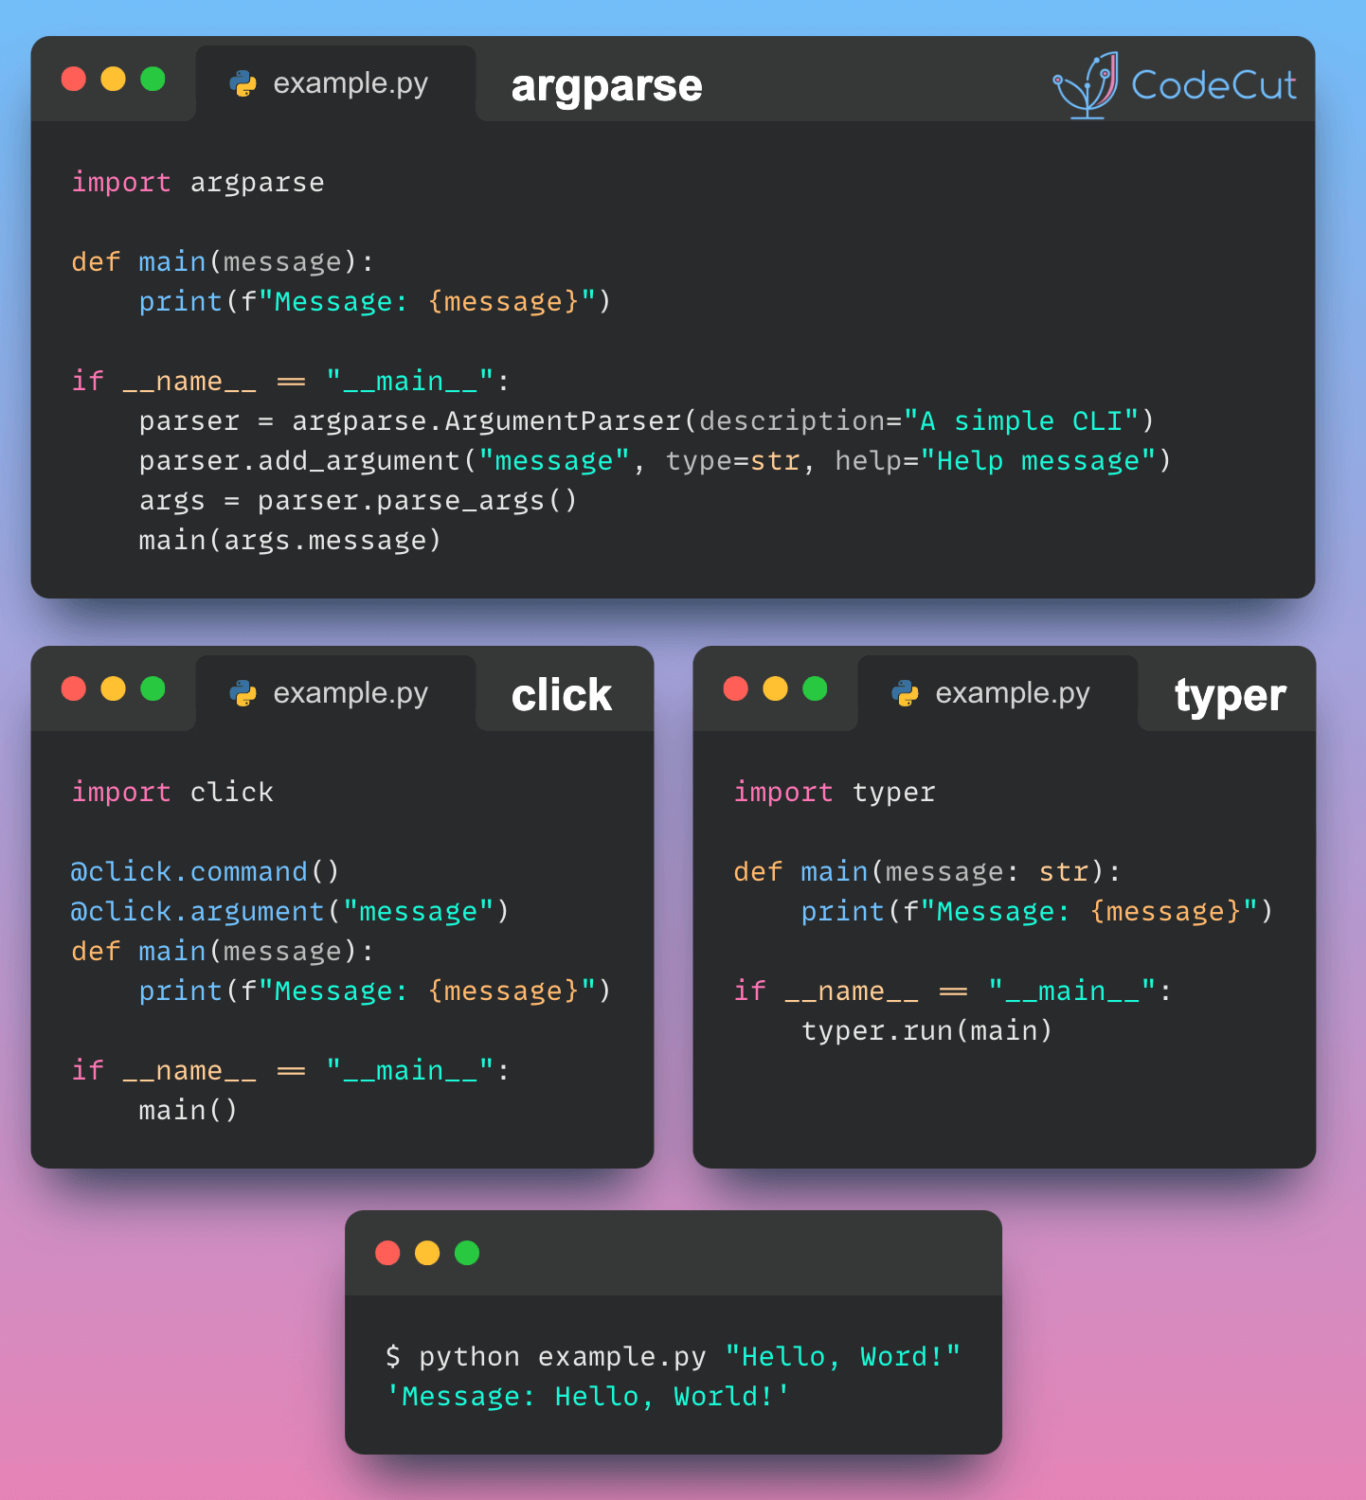
Comparing Python Command Line Interface Tools: Argparse, Click, and Typer

Python has several tools for creating CLIs, each with its own approach and syntax. Three popular choices for parsing command-line arguments and options are argparse, click, and typer.

argparse: Requires manual argument parsing setup with verbose syntax.

click: Offers a more concise and declarative way to define commands with decorators.

typer: Utilizes Python type hints to create a clean and modern CLI interface with minimal boilerplate.

Here’s a comparison of how to create a simple CLI application with a single command that accepts a string argument using argparse, click, and typer.

argparse

# argparse_example.py
import argparse

def main(message):
print(f"Message: {message}")

if __name__ == "__main__":
parser = argparse.ArgumentParser(description="A simple CLI with argparse")
parser.add_argument("message", type=str, help="The message to print")
args = parser.parse_args()
main(args.message)

Usage:

python argparse_example.py "Hello, World!"

click

# click_example.py
import click

@click.command()
@click.argument("message")
def main(message):
print(f"Message: {message}")

if __name__ == "__main__":
main()

Usage:

python click_example.py "Hello, World!"

typer

# typer_example.py
import typer

def main(message: str):
print(f"Message: {message}")

if __name__ == "__main__":
typer.run(main)

Usage:

python typer_example.py "Hello, World!"

Favorite

Comparing Python Command Line Interface Tools: Argparse, Click, and Typer Read More »

0
    0
    Your Cart
    Your cart is empty
    Scroll to Top

    Work with Khuyen Tran

    Work with Khuyen Tran